Easy Chocolate Mousse
Watch the Full Step-by-Step
- 2 large glasses
INGREDIENTS
- Chocolate crisps or shavings, for garnish
Dark chocolate mousse:
- 3.5 ounces/100 grams dark chocolate, finely chopped
- 3.5 fl ounces/100 milliliters heavy whipping cream, divided
Milk chocolate mousse:
- 5.3 ounces/150 grams milk chocolate, chopped
- 1.7 fl ounces/50 milliliters heavy whipping cream, for the ganache
- 3.5 fl ounces/100 milliliters heavy whipping cream, for the mousse
White chocolate mousse:
- 7 ounces/200 grams white chocolate, finely chopped
- 1.7 fl ounces/50 milliliters heavy whipping cream, for the ganache
- 3.5 fl ounces/100 milliliters heavy whipping cream, for the mousse
INSTRUCTIONS
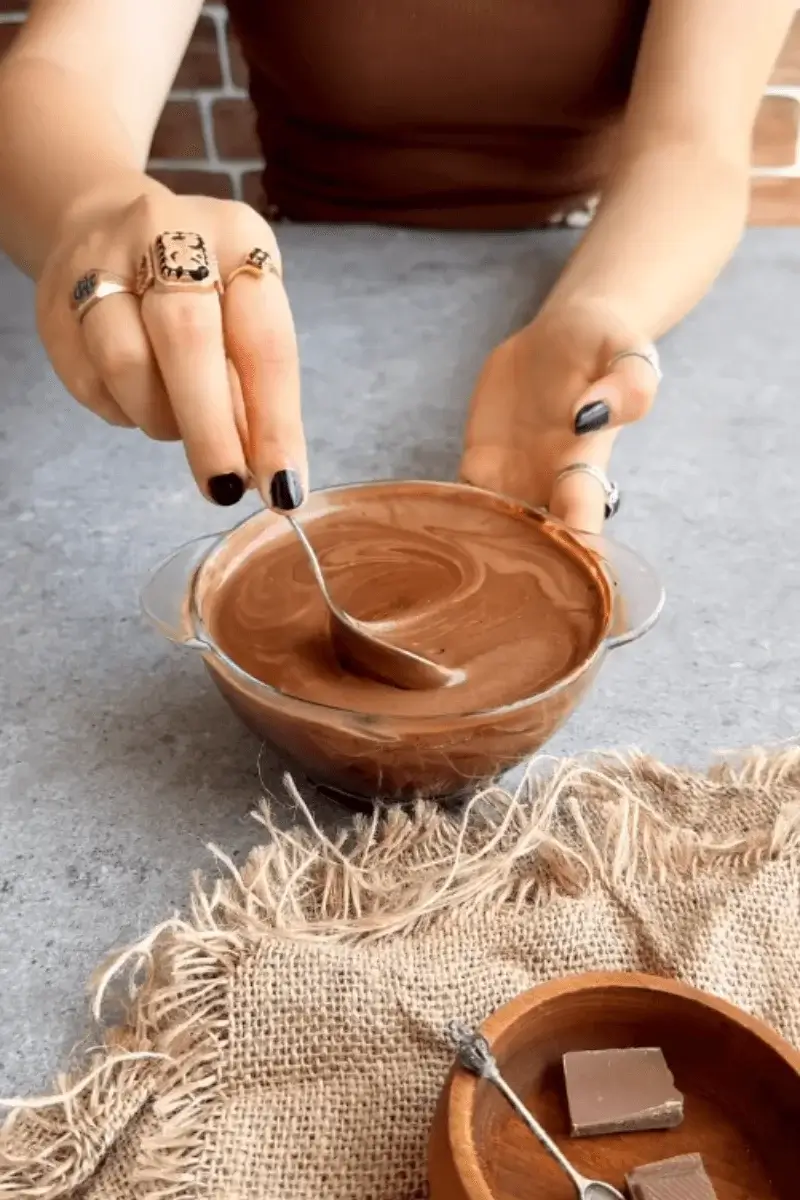
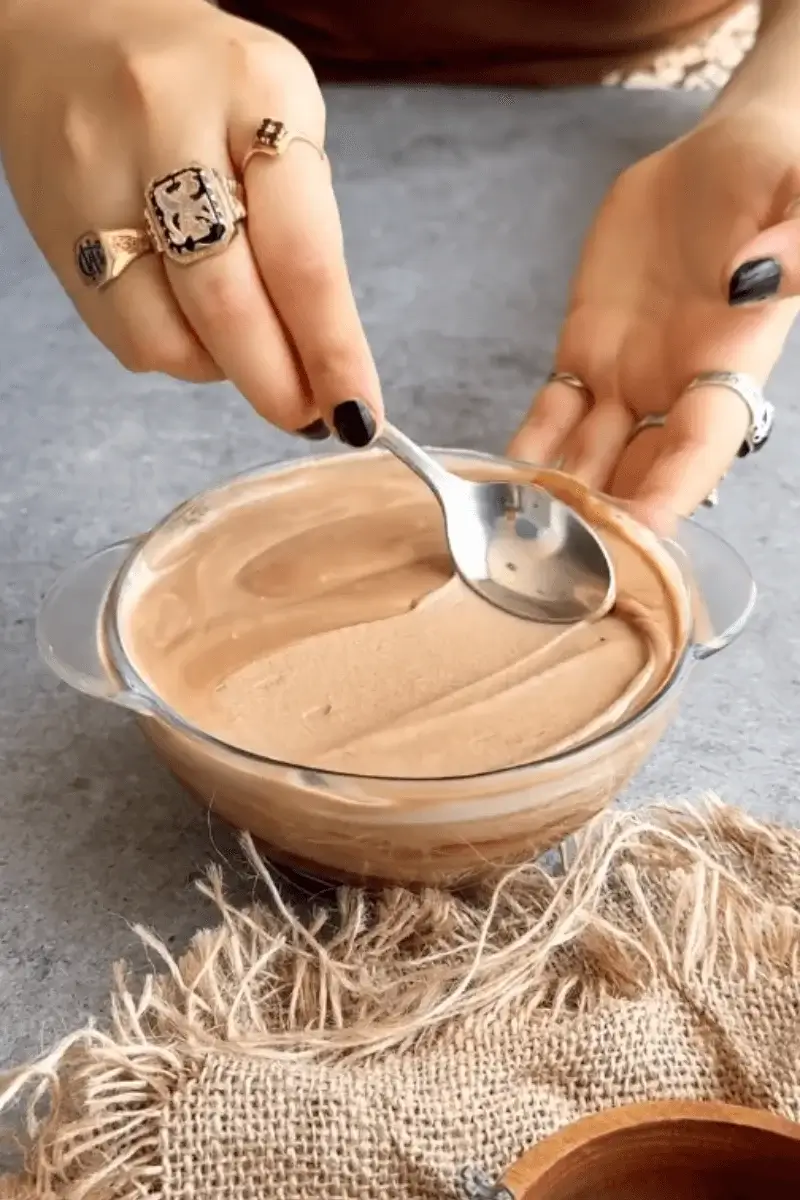
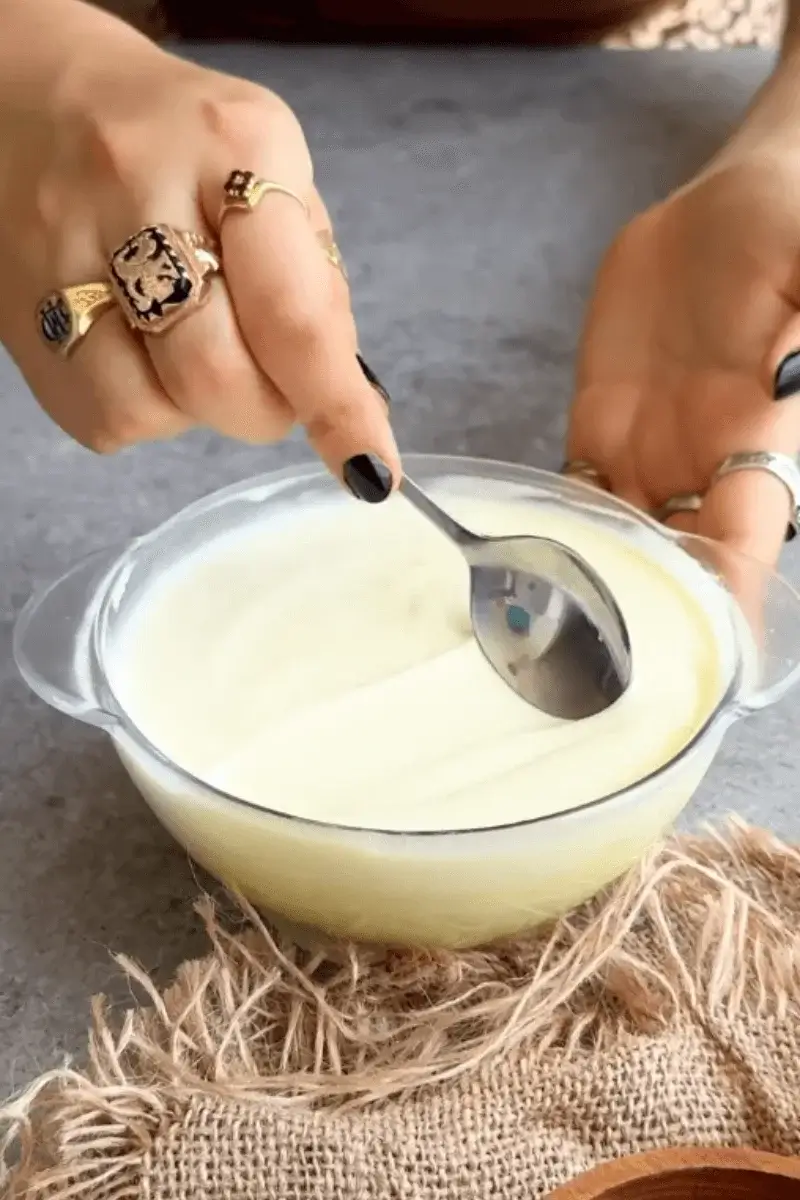
- Place the dark and white chocolates in separate heatproof bowls. Add the designated amount of heavy cream for ganache to each. Microwave in 15-second bursts, stirring between intervals, until smooth and fully melted. Let cool slightly.
- In a large bowl, whip 10.5 fl ounces/300 milliliters heavy whipping cream until stiff peaks form. Divide evenly, adding about 3.5 fl ounces/100 milliliters to each chocolate mixture. Gently fold until fully incorporated and smooth. Transfer each mousse to a separate piping bag.
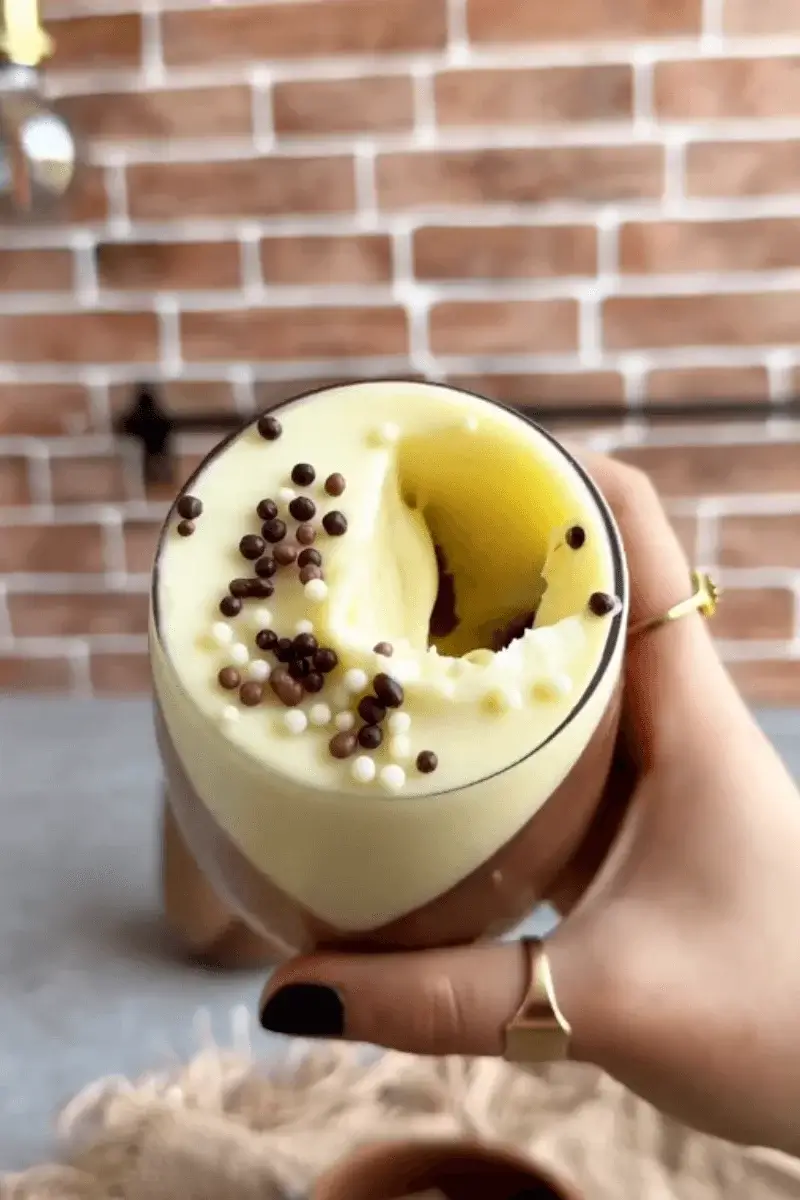
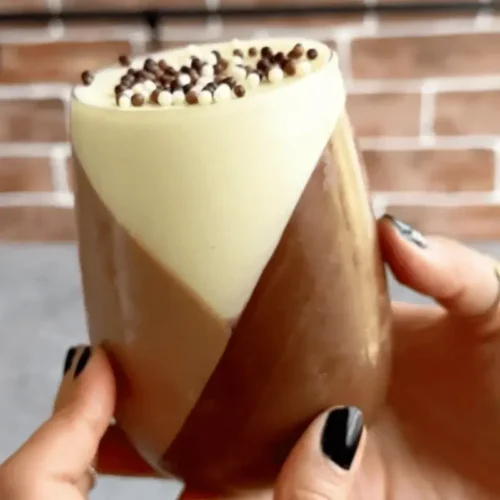
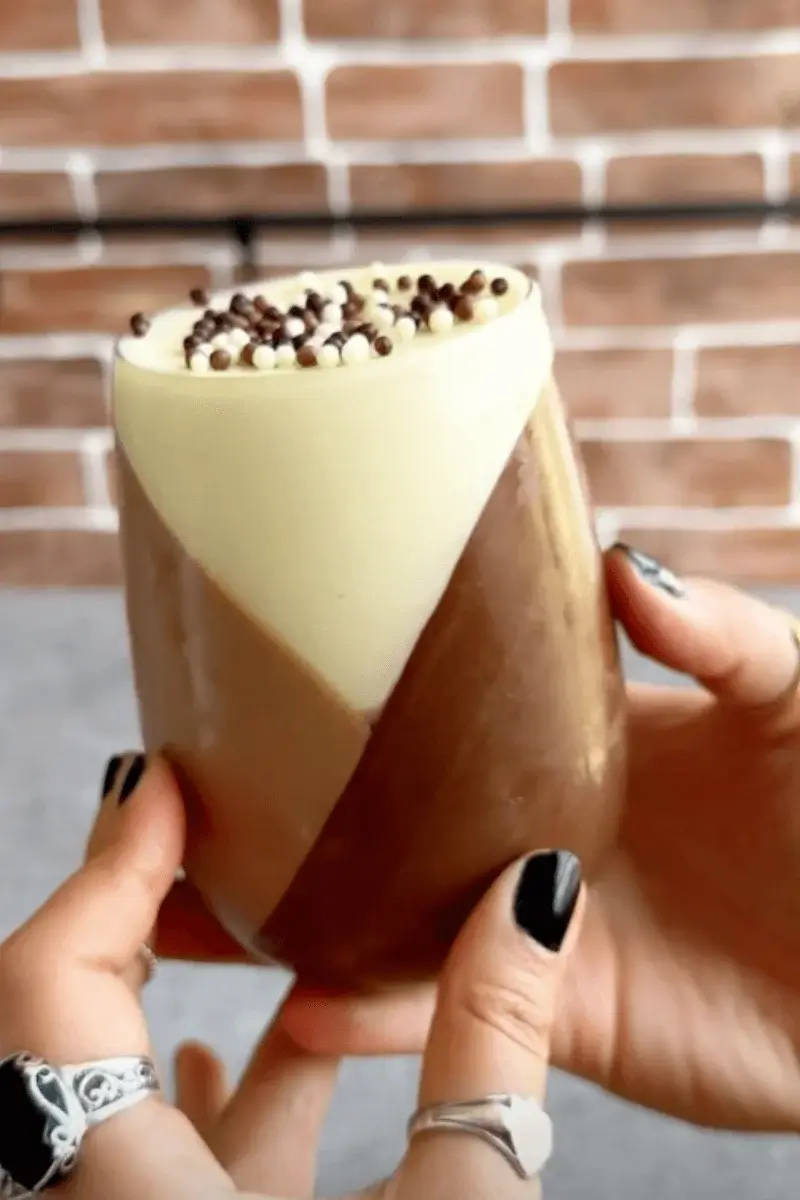
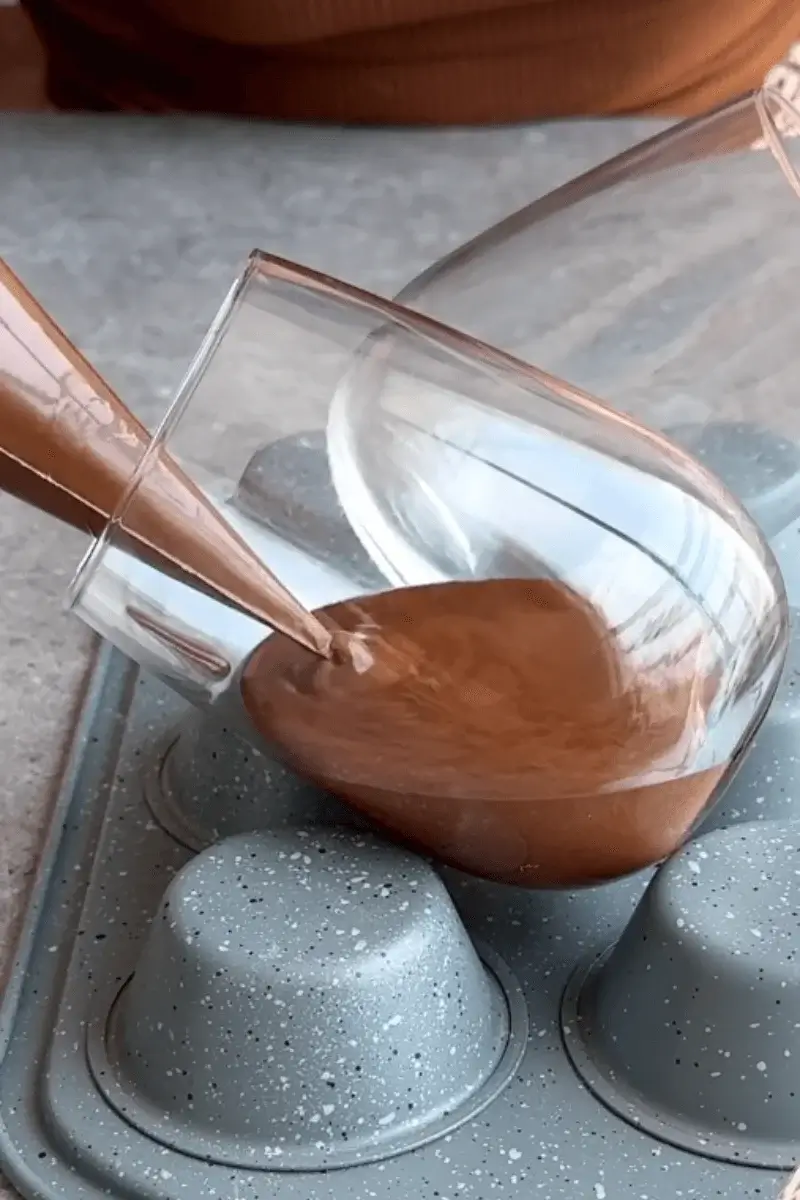
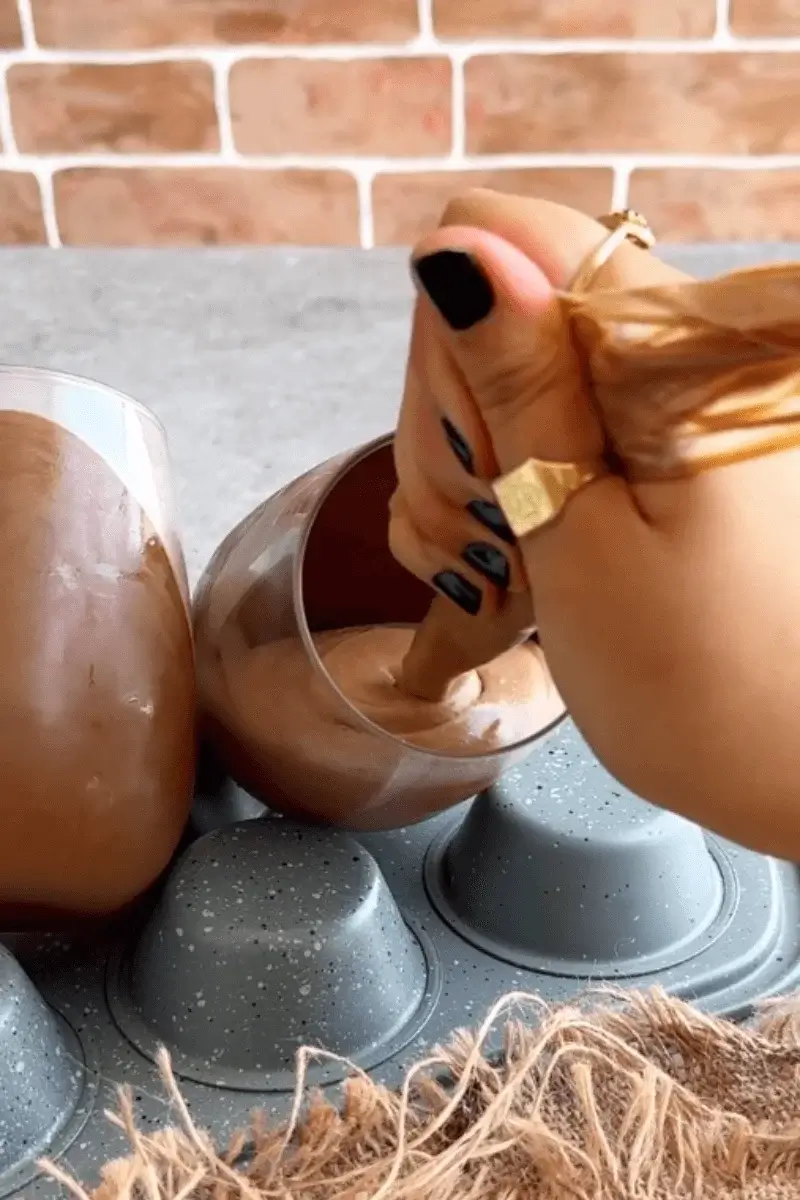
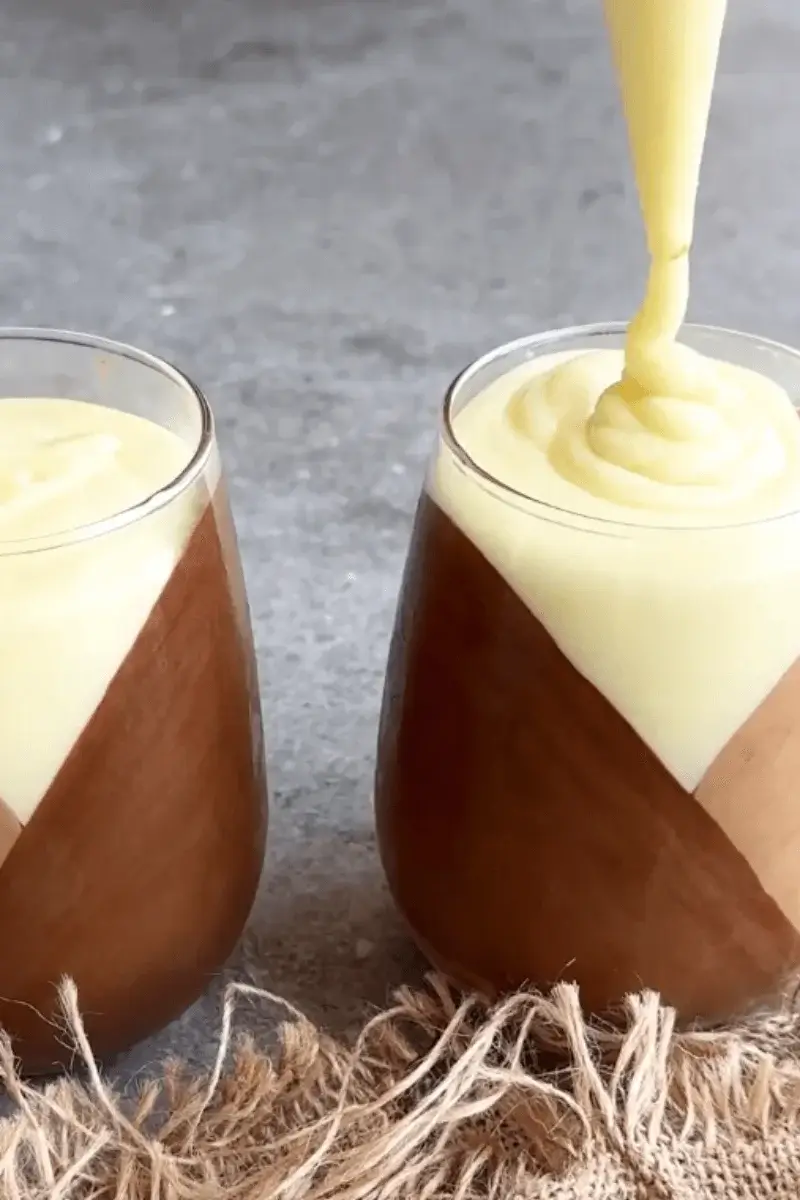
- Flip a sturdy muffin tin upside down and rest serving glasses on their sides. Pipe the dark chocolate mousse into the tilted glasses, creating an angled effect. Carefully transfer to the freezer and chill for 30 minutes, until set.
- Rotate the glasses and pipe the white chocolate mousse (or a milk chocolate layer, if using). Freeze again for 30 minutes.
- Stand the glasses upright and pipe the remaining mousse to the rim. Freeze for 1 hour to set completely.
- Just before serving, sprinkle with chocolate crisps or shavings. Serve immediately for the best texture.
RECIPE NOTES
FAQ
Best type of chocolate for this easy chocolate mousse
For the best results, use high-quality chocolate with a cocoa content of at least 60% for the dark chocolate layer. Dark chocolate with lower cocoa content may not set as well, resulting in a softer texture. For white chocolate, look for real white chocolate that contains cocoa butter rather than vegetable oils, as it will melt more smoothly and provide a better consistency. If substituting milk chocolate, choose one with at least 30% cocoa solids.
Avoid chocolate chips, as they contain stabilizers that prevent proper melting and can affect the final texture of the mousse. Additionally, finely chop the chocolate before melting to ensure even and quick melting without overheating. If using flavored chocolate, such as orange or caramel-infused varieties, be aware that they may alter the texture slightly due to added sugars or oils. Always melt chocolate slowly to avoid seizing, and allow it to cool slightly before incorporating it into the mousse to maintain a smooth consistency.
Can I make this easy chocolate mousse ahead of time?
Yes, this easy chocolate mousse can be made ahead of time and stored in the refrigerator for up to two days. If freezing, it will keep for up to a week. However, for the best texture, allow it to soften slightly at room temperature for about 10 minutes before serving. If making in advance, cover the glasses with plastic wrap to prevent the mousse from absorbing any odors from the refrigerator or freezer. Avoid adding the garnish until just before serving to maintain its crunch and visual appeal. If preparing for an event, assembling the mousse a day in advance is ideal.
For extended storage, freezing is recommended, but always ensure the mousse is in an airtight container to prevent ice crystals from forming, which can negatively impact texture. If the mousse appears slightly firm after refrigeration, a few minutes at room temperature will help restore its creamy consistency before serving.
How do I prevent the chocolate from seizing when melting?
Chocolate seizes when it comes into contact with even a small amount of water or if it is overheated. To prevent this, always use dry utensils and bowls. When melting chocolate, use short bursts of heat in the microwave—about 15 seconds at a time—stirring in between to distribute the heat evenly. If melting over a double boiler, make sure the bottom of the bowl does not touch the simmering water, and keep steam away from the chocolate. If chocolate does seize, try adding a small amount of warm cream or butter and stirring vigorously to bring it back to a smooth consistency.
Using chopped chocolate instead of large chunks also ensures even melting, reducing the chances of overheating. If possible, melt chocolate at lower temperatures and stir frequently rather than relying on continuous heat. When combining with cream, always ensure the chocolate is slightly cooled to prevent temperature shock, which can also cause seizing.
Best way to whip cream to stiff peaks
For the best results, start with cold heavy cream, as it whips more easily and holds its structure better. Use a chilled mixing bowl and beaters or whisk attachment to help maintain the temperature. Begin whipping on low speed to incorporate air gradually, then increase to medium-high speed. Look for peaks that hold their shape when you lift the whisk but still have a slight bend at the tip. Be careful not to overwhip, as the cream can quickly turn grainy and eventually separate into butter.
If using sweetened cream, add sugar or vanilla extract when soft peaks begin to form. The ideal whipping time varies depending on the speed of the mixer, but it typically takes 2-4 minutes with an electric mixer. If whipping by hand, it may take closer to 8-10 minutes. If you accidentally overwhip, try folding in a small amount of unwhipped cream to loosen the consistency before incorporating it into the mousse.
Can I make this easy chocolate mousse without a piping bag?
Yes, a piping bag is helpful for clean and precise layering of this easy chocolate mousse dessert, but it is not necessary. If you don’t have one, you can use a resealable plastic bag with a small hole cut in one corner. Alternatively, you can spoon the mousse carefully into the glasses, though this may result in less defined layers. To keep the layers neat, use a spoon or spatula to gently smooth each layer before adding the next. Chilling the glasses between layers is essential for maintaining sharp edges. If tilting the glasses for angled layers, spooning the mousse may be trickier, so a makeshift piping bag or squeeze bottle is recommended for better control. If using a spoon, try dropping the mousse into the glass close to the surface to minimize spreading and uneven layering.
What can I use instead of chocolate crisps for garnish?
You can substitute them with chocolate shavings, crushed chocolate cookies, cocoa nibs, or even finely chopped nuts like hazelnuts or almonds. Shaved chocolate can be made by running a vegetable peeler along the edge of a chocolate bar. For added texture, you can sprinkle crushed wafer cookies or crumbled chocolate-covered cereal. If you prefer a decorative touch, dusting the top with cocoa powder or drizzling with melted chocolate can enhance both the flavor and presentation. The key is to add a crunchy element to contrast with the smooth mousse. If you want to add a fruit element, finely chopped freeze-dried raspberries or candied orange zest can work well as a garnish.
How do I get the layers to look neat and even?
To achieve clean layers, ensure each layer is set before adding the next. Use a piping bag for better control, and pipe the mousse gently to prevent it from disturbing the layer beneath it. If spooning the mousse, carefully smooth each layer with the back of a spoon or an offset spatula. Chilling the glasses between layers is essential for maintaining sharp edges. If aiming for angled layers, tilt the glasses securely using an inverted muffin tin or a similar support. For the most precise look, work patiently, and avoid rushing the freezing process before adding the next layer. If any mousse spills or smudges the glass, wipe it with a clean paper towel before freezing.
Can I store leftovers in the fridge?
Leftovers of this easy chocolate mousse can be stored in the fridge, but the mousse will have a softer consistency. If refrigerated, it should be consumed within two days for the best texture and flavor. If the mousse was initially frozen, allow it to thaw in the refrigerator for at least an hour before serving. Cover the glasses with plastic wrap to prevent the mousse from absorbing any unwanted odors. While refrigeration works well for maintaining a creamy texture, freezing is recommended if you need to store the mousse for more than a couple of days. If serving after refrigeration, let it sit at room temperature for a few minutes for optimal texture.