Biscoff Brownies with Dark Chocolate Chunks
Watch the Full Step-by-Step
- 8-inch/20 cm square baking pan
- Chef's knife
- Baking sheet
INGREDIENTS
- 6 heaping tablespoons Biscoff cookie butter
- Biscoff cookies, broken into pieces
- 3.5 ounces/100 grams dark chocolate, chopped
- Batter:
- 7 ounces/200 grams dark chocolate
- 7 ounces/200 grams unsalted butter
- 3 large eggs
- 1 cup/200 grams granulated sugar
- ⅓ cup/65 grams light brown sugar
- ¼ cup/30 grams unsweetened cocoa powder
- ¾ cup/100 grams all-purpose flour
- Pinch of fine sea salt
INSTRUCTIONS
- Heat the oven to 350°F/175°C, and line an 8-inch/20 cm square baking pan with parchment paper, leaving an overhang on two sides for easy removal.
- In a large heatproof bowl, combine the butter and dark chocolate. Microwave in 30-second intervals, stirring after each, until completely melted and smooth. Let cool slightly.
- Whisk in the granulated sugar, brown sugar, and eggs until the mixture is glossy and well combined. Sift in the cocoa powder, flour, and salt. Stir with a rubber spatula just until no streaks remain. Fold in half of the chopped chocolate.
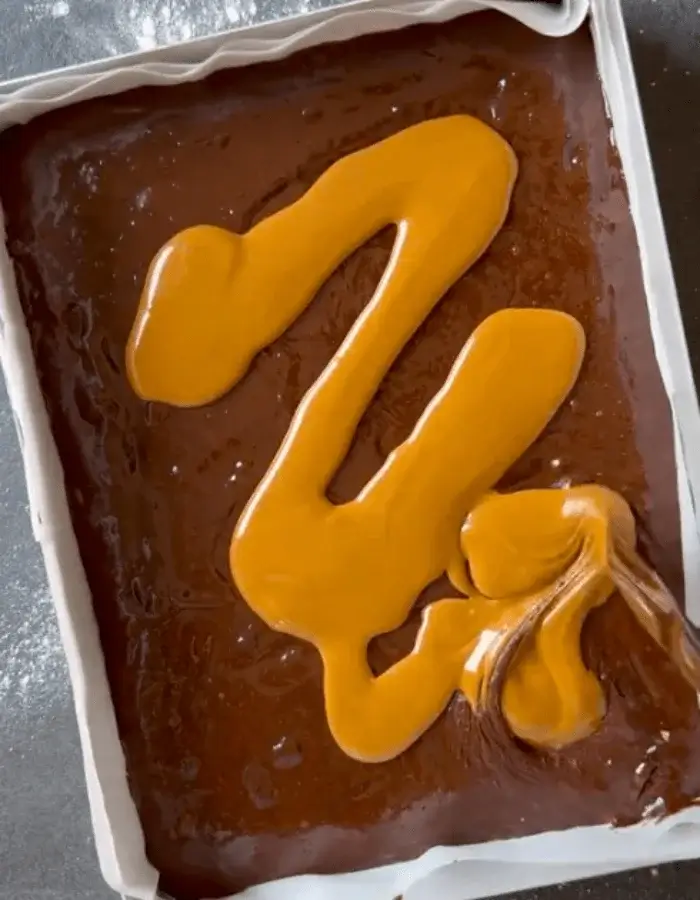
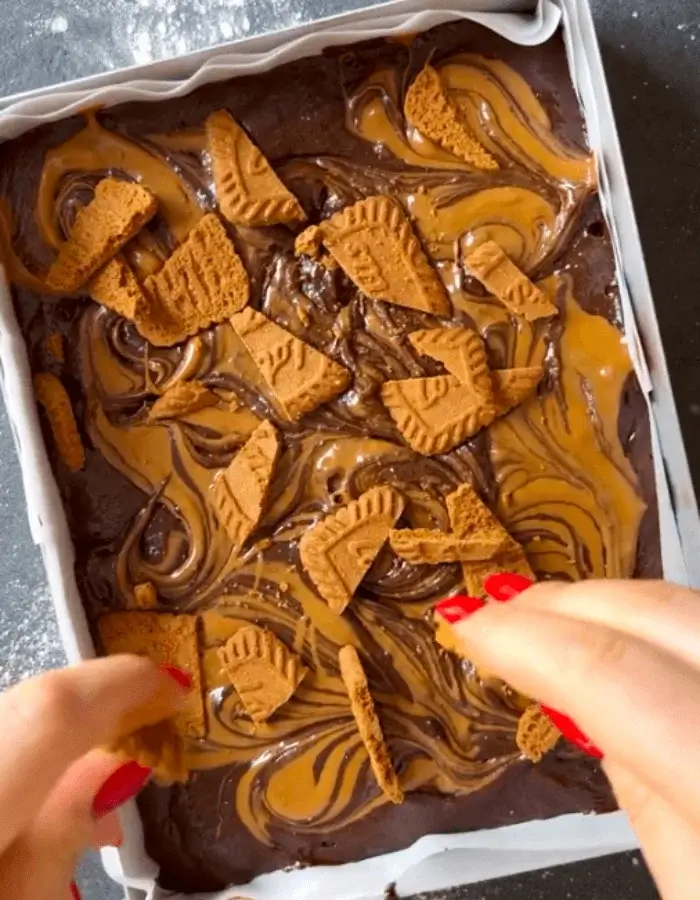
- Pour half of the batter into the prepared pan and smooth the surface. Spoon 3 tablespoons of the Biscoff spread over the batter and swirl lightly with a toothpick or the tip of a knife. Spread the remaining batter on top and smooth again. Transfer the remaining 3 tablespoons of Biscoff spread to a piping bag or small zip-top bag. Snip the tip and pipe diagonal stripes across the surface. Drag a toothpick through the lines in the opposite direction to create a marbled pattern.
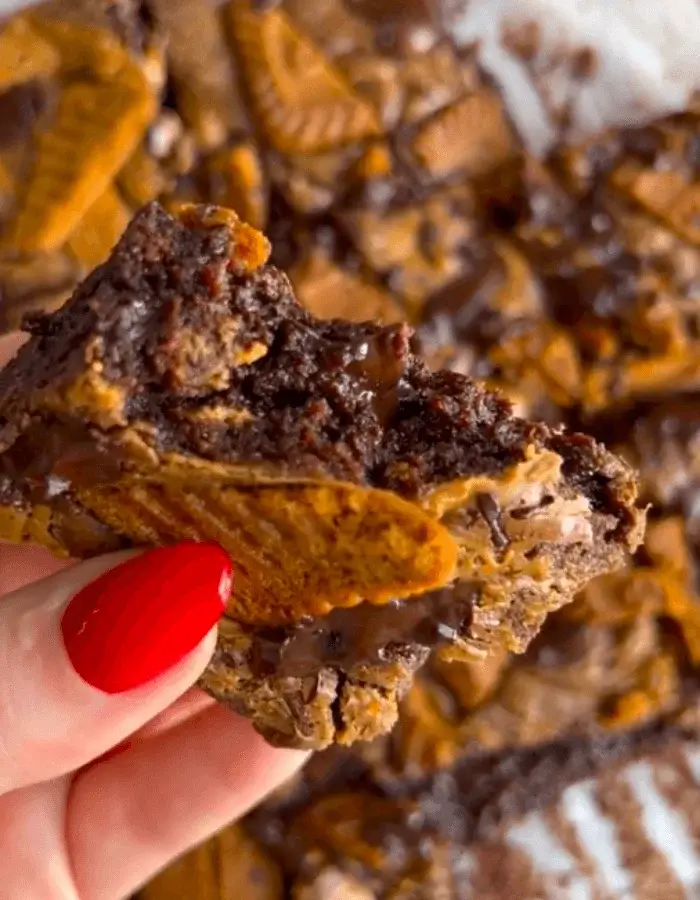
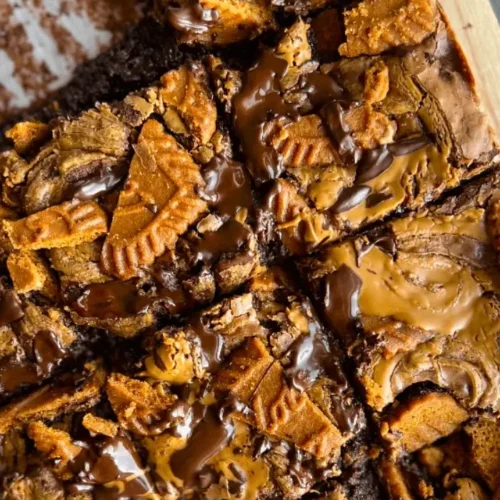
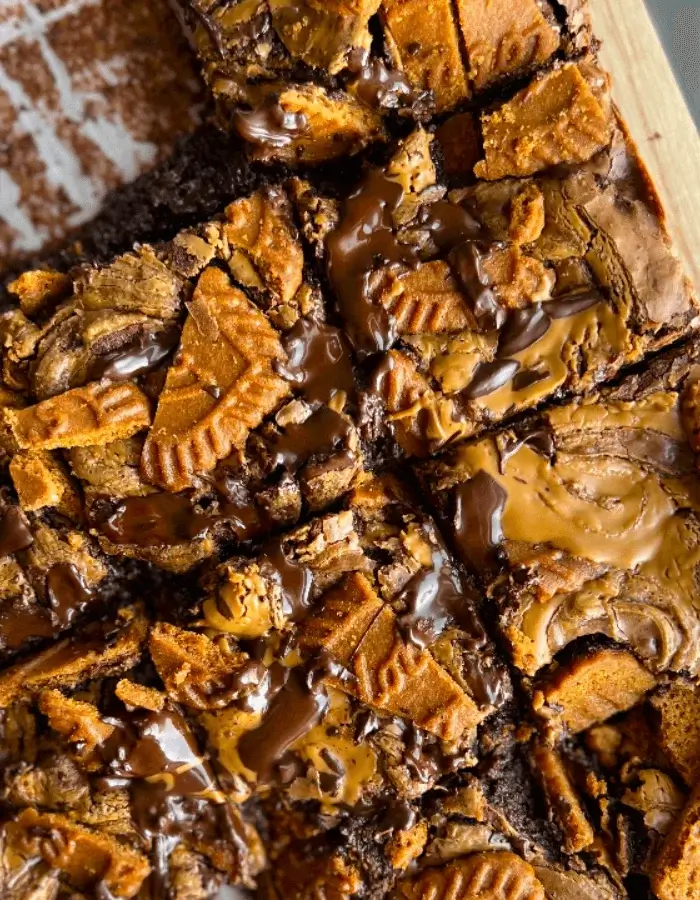
- Sprinkle the remaining chopped chocolate and a handful of broken Biscoff cookies over the top.
- Bake for 25 to 30 minutes, or until the edges are set and the center is just barely jiggly. A toothpick inserted should come out with moist crumbs but no raw batter.
- Let cool completely in the pan on a wire rack. Refrigerate for at least 3 hours, or freeze for 2 hours, until fully set.
- Use the parchment overhang to lift the brownies from the pan. Slice into squares with a sharp knife, wiping between cuts for clean edges. Store in an airtight container at room temperature for up to 5 days, or refrigerate for up to a week.
FAQ
How can I make Biscoff brownies gluten-free?
Substitute the all-purpose flour with a 1:1 gluten-free flour blend that contains xanthan gum or another binder. Keep in mind that Lotus Biscoff cookies and spread both contain wheat, so you will also need to use a gluten-free cookie butter spread and gluten-free cookies for topping. Several brands offer speculoos-style spreads that are certified gluten-free.
How should I swirl the Biscoff spread into the brownies?
For smooth and even swirls in your Biscoff brownies, warm the Biscoff spread slightly in the microwave until it’s loose but not runny—about 10 to 15 seconds. Dollop it in small spoonfuls over the batter and use a toothpick or skewer to gently swirl it through. Don’t overmix, or the spread will blend in too much and lose its marbled look. For neater lines, you can also transfer the spread to a piping bag or small zip-top bag with the corner snipped off before swirling.
How long do Biscoff brownies last at room temperature?
The brownies will stay fresh at room temperature for up to 5 days when stored in an airtight container in a cool, dry place. Make sure the container is sealed tightly to prevent the brownies from drying out. If your kitchen is particularly warm, it’s safer to store them in the refrigerator, where they’ll last for about a week. Bring them to room temperature before serving for the best texture and flavor.
Can I freeze Biscoff brownies after baking?
Yes, these Biscoff brownies freeze very well. After baking and cooling completely, slice the brownies and wrap each piece tightly in plastic wrap or parchment paper. Store them in an airtight container or freezer bag for up to 2 months. To thaw, let them sit at room temperature for a few hours or microwave individual squares for about 20 seconds. Freezing helps maintain their fudgy texture, especially if you like your brownies slightly chilled.
What makes Biscoff brownies fudgy instead of cakey?
Fudgy brownies like these Biscoff brownies depend on a high fat-to-flour ratio, minimal mixing after the flour is added, and a short baking time. The combination of melted butter, dark chocolate, and relatively little flour helps create a dense, moist texture. Avoid overmixing once the flour goes in, and don’t overbake—this ensures the brownies stay soft in the center. Using a mix of granulated and brown sugar also helps retain moisture. If you want a cakier texture, add ½ teaspoon of baking powder and bake 5 minutes longer.
Should I use Biscoff spread straight from the jar or warm it first?
Warming the Biscoff spread briefly before swirling it into the brownies is ideal. When slightly warmed—about 10 to 15 seconds in the microwave—it becomes more fluid and easier to drizzle or marble into the batter. This helps achieve smooth, attractive swirls without clumping or tearing the surface. If you use it straight from the jar while cold, it may be too stiff and won’t blend well into the batter, making the swirl less visually appealing and harder to distribute evenly.
Do I have to use both granulated and brown sugar?
Using both granulated sugar and light brown sugar gives Biscoff brownies the ideal balance of structure and moisture. Granulated sugar provides crisp edges and helps the brownies set, while light brown sugar adds a subtle caramel flavor and contributes to the soft, fudgy center. You can technically use just one type of sugar if needed, but the texture and depth of flavor won’t be as rich. If substituting, use the same total amount—about 1⅓ cups/265 grams—and expect slightly altered results.
Can I make these Biscoff brownies without eggs?
For each egg, use 1 tablespoon ground flaxseed mixed with 3 tablespoons water and let it sit for 10 minutes until gelled. For this recipe, you’ll need 3 tablespoons flaxseed meal and 9 tablespoons water. This will result in slightly denser brownies with less rise, but the flavor and fudgy texture will still shine. You can also use commercial egg replacers like Ener-G or Bob’s Red Mill, following the package instructions for 3 eggs.
How do I keep the brownies from overbaking?
Start checking for doneness at the 25-minute mark. The edges should look set and slightly pulled away from the pan, while the center should still jiggle slightly when gently shaken. A toothpick inserted into the center should come out with a few moist crumbs but not wet batter. If it comes out dry, the brownies are likely overbaked and may turn cakey. Using an oven thermometer can also help ensure your oven temperature is accurate.