Easy Challah Braiding Method You Can Learn Right Now
We may earn a commission from recommended products, at no extra cost to you. See Disclosure.
INGREDIENTS
4 pieces:
- 2.2 pounds/1 kilograms white flour
- 2 tablespoons dry yeast, or 50 grams fresh yeast
- 6 tablespoons/70 grams sugar
- 2 cups/480 milliliters lukewarm water
- 1 egg
- ½ cup/100 grams olive oil or regular oil
- 2½ teaspoons/13 grams salt
- Flour for dusting or glaze made of a beaten egg with coarse salt
INSTRUCTIONS
- In a mixing bowl with a dough hook, combine the flour, sugar, and yeast. Mix lightly. Start mixing on medium speed, adding the water, egg, and finally the oil. Continue mixing until the dough is smooth and pulls away from the sides of the bowl, about 14 minutes.
- Transfer the dough to a large bowl, cover it with plastic wrap, and let it rise in a warm, humid place for about 45 minutes (depending on room temperature). After rising, deflate the dough with your hand.
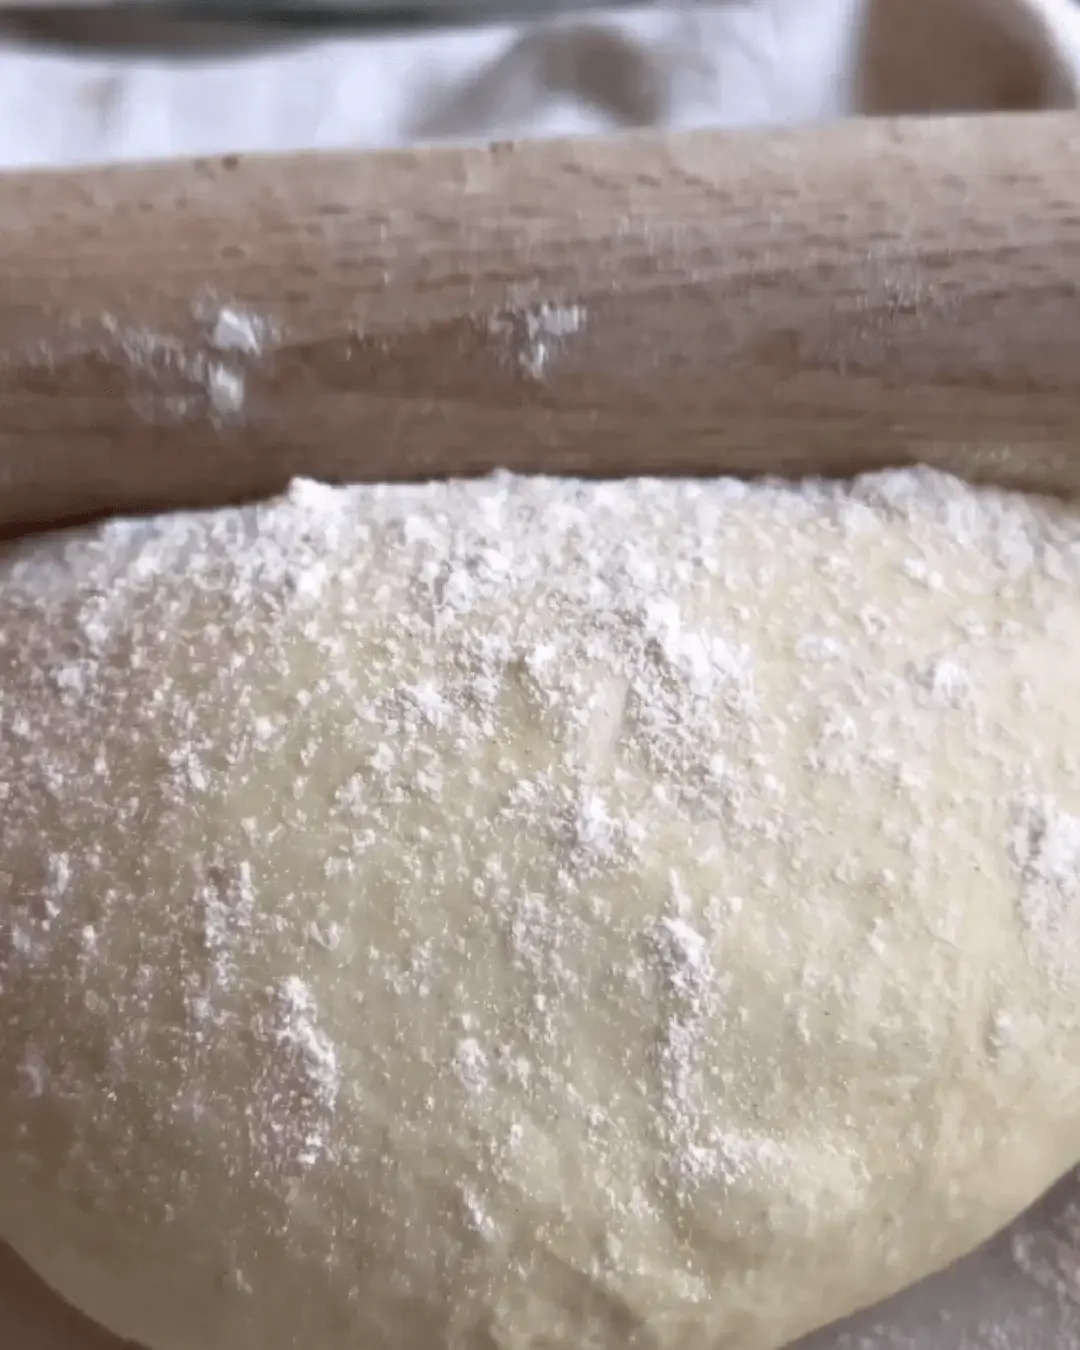
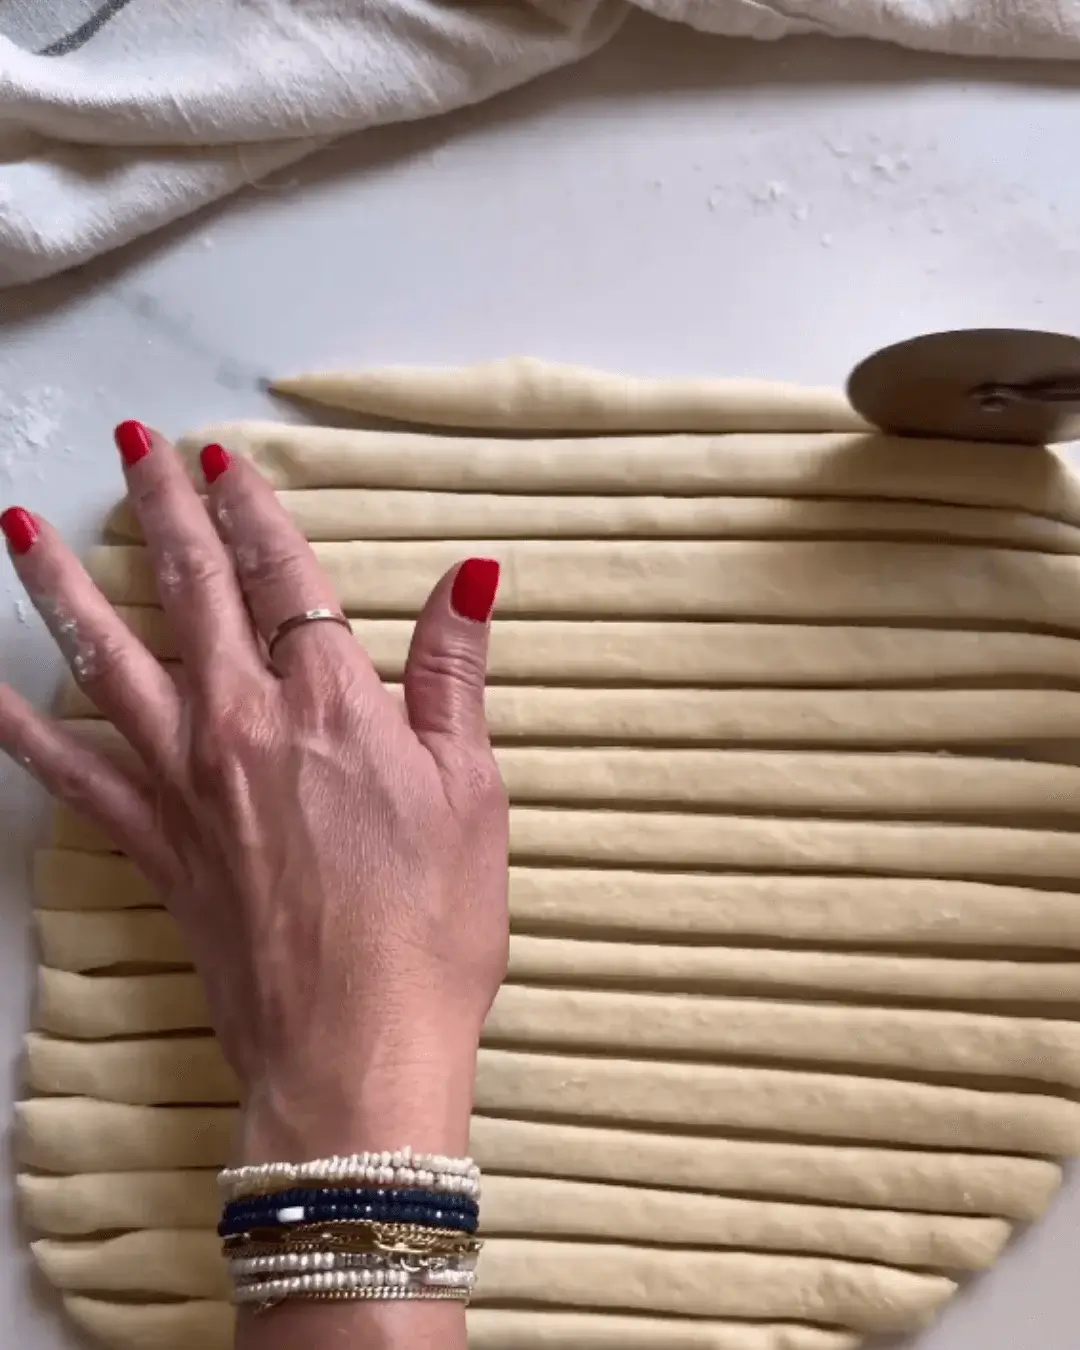
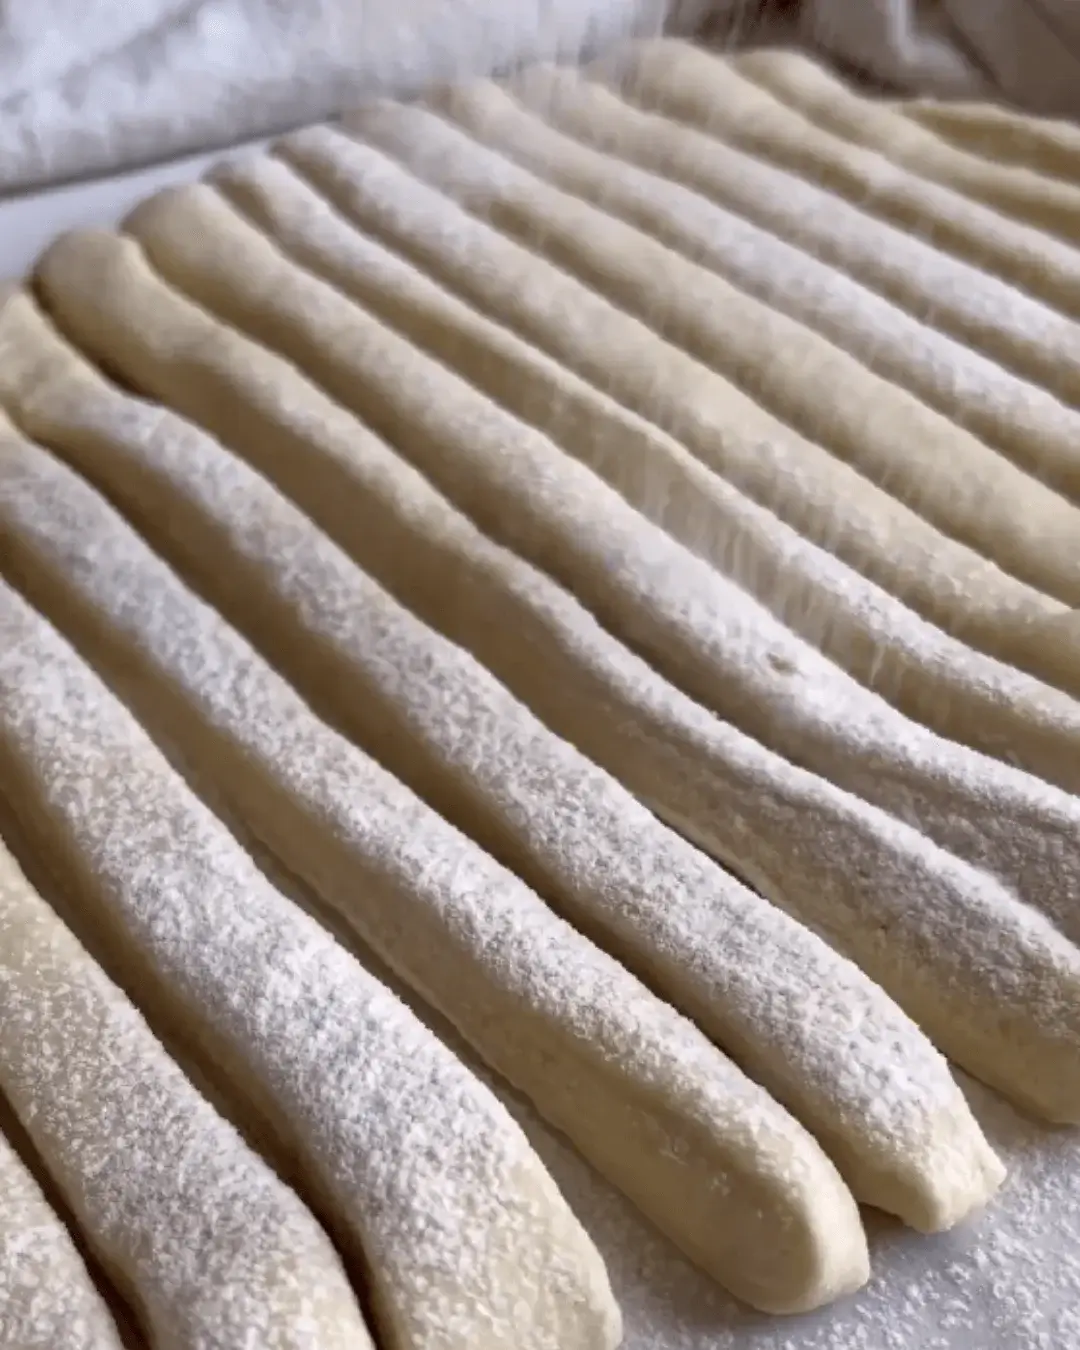
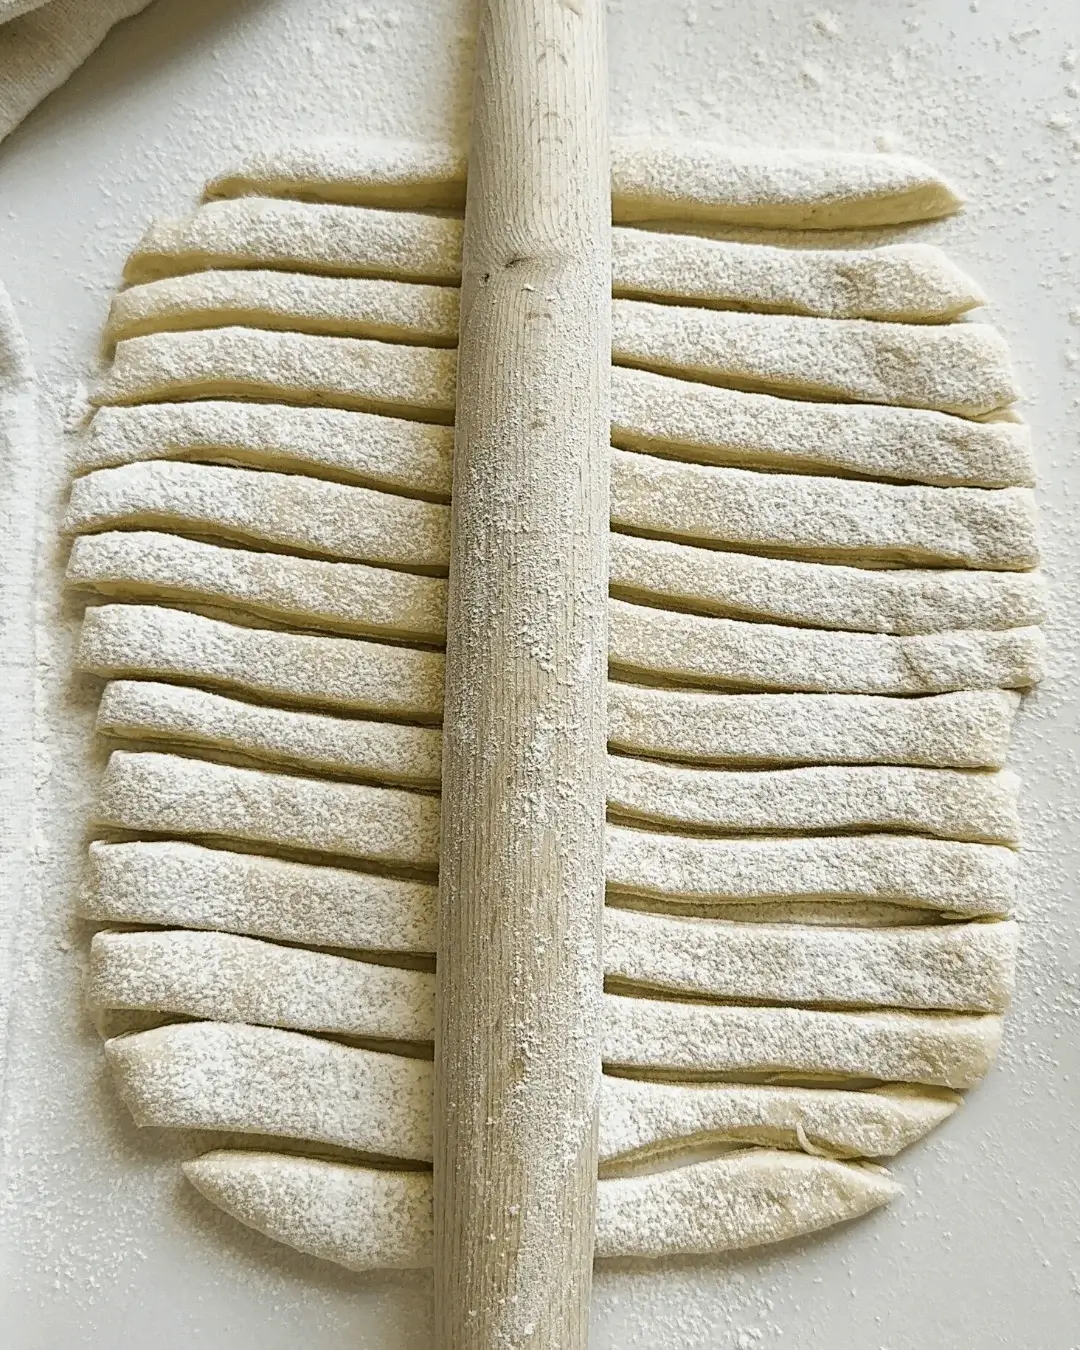
- Divide the dough into 4 parts. Roll each part into a ball, cover the balls, and work with one ball at a time. On a lightly floured surface, roll the ball into a rectangle and cut it into strips about 1 cm wide with a pastry cutter.
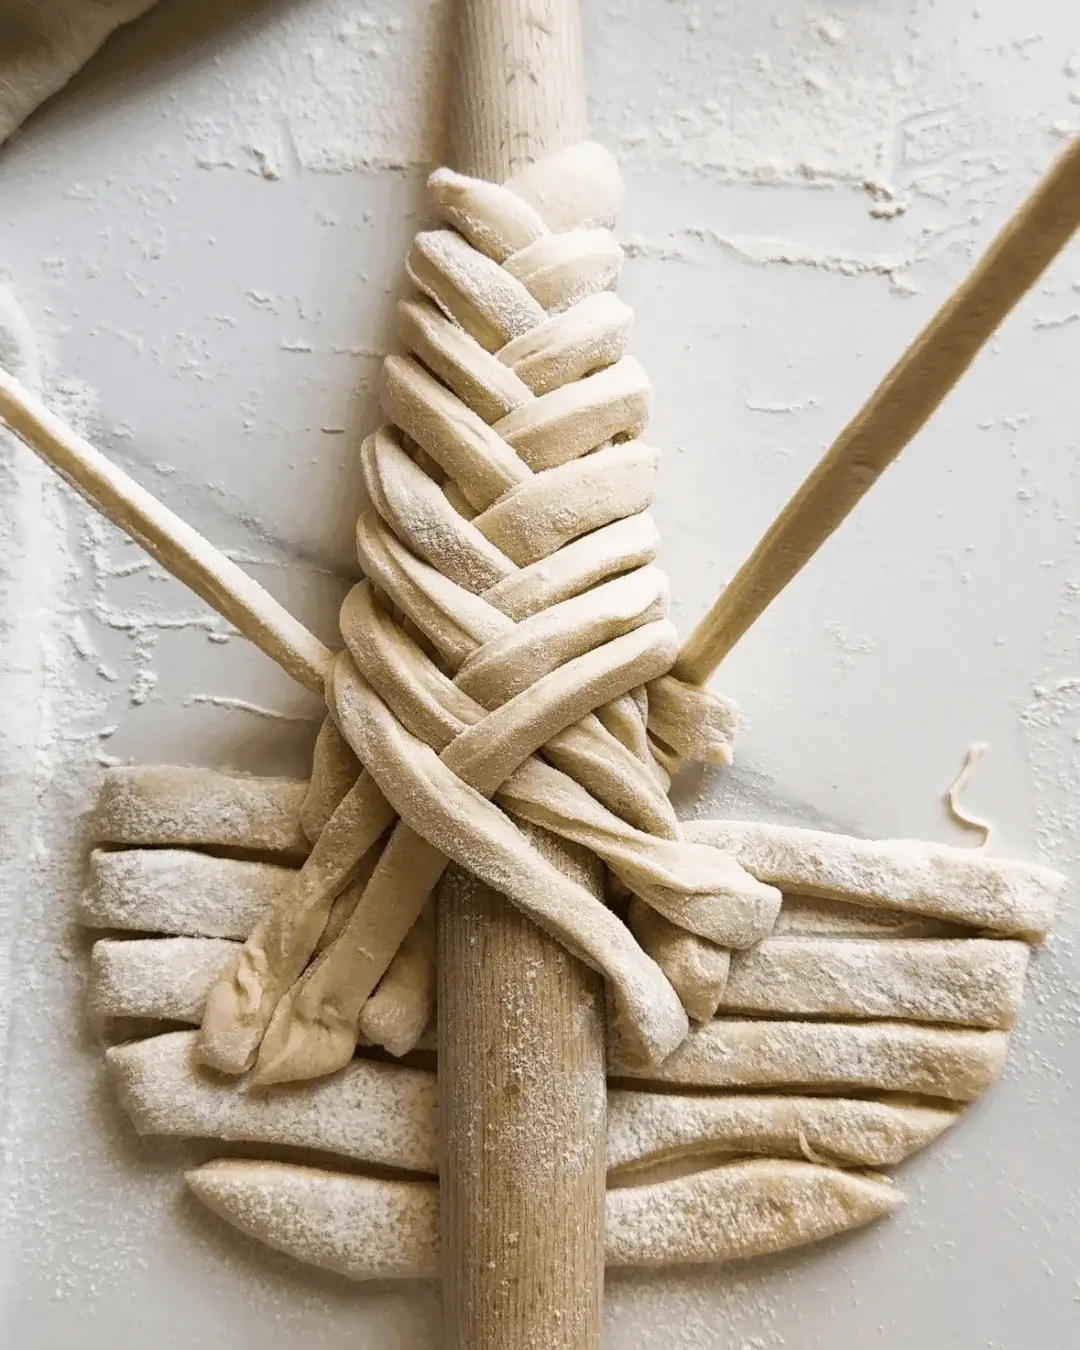
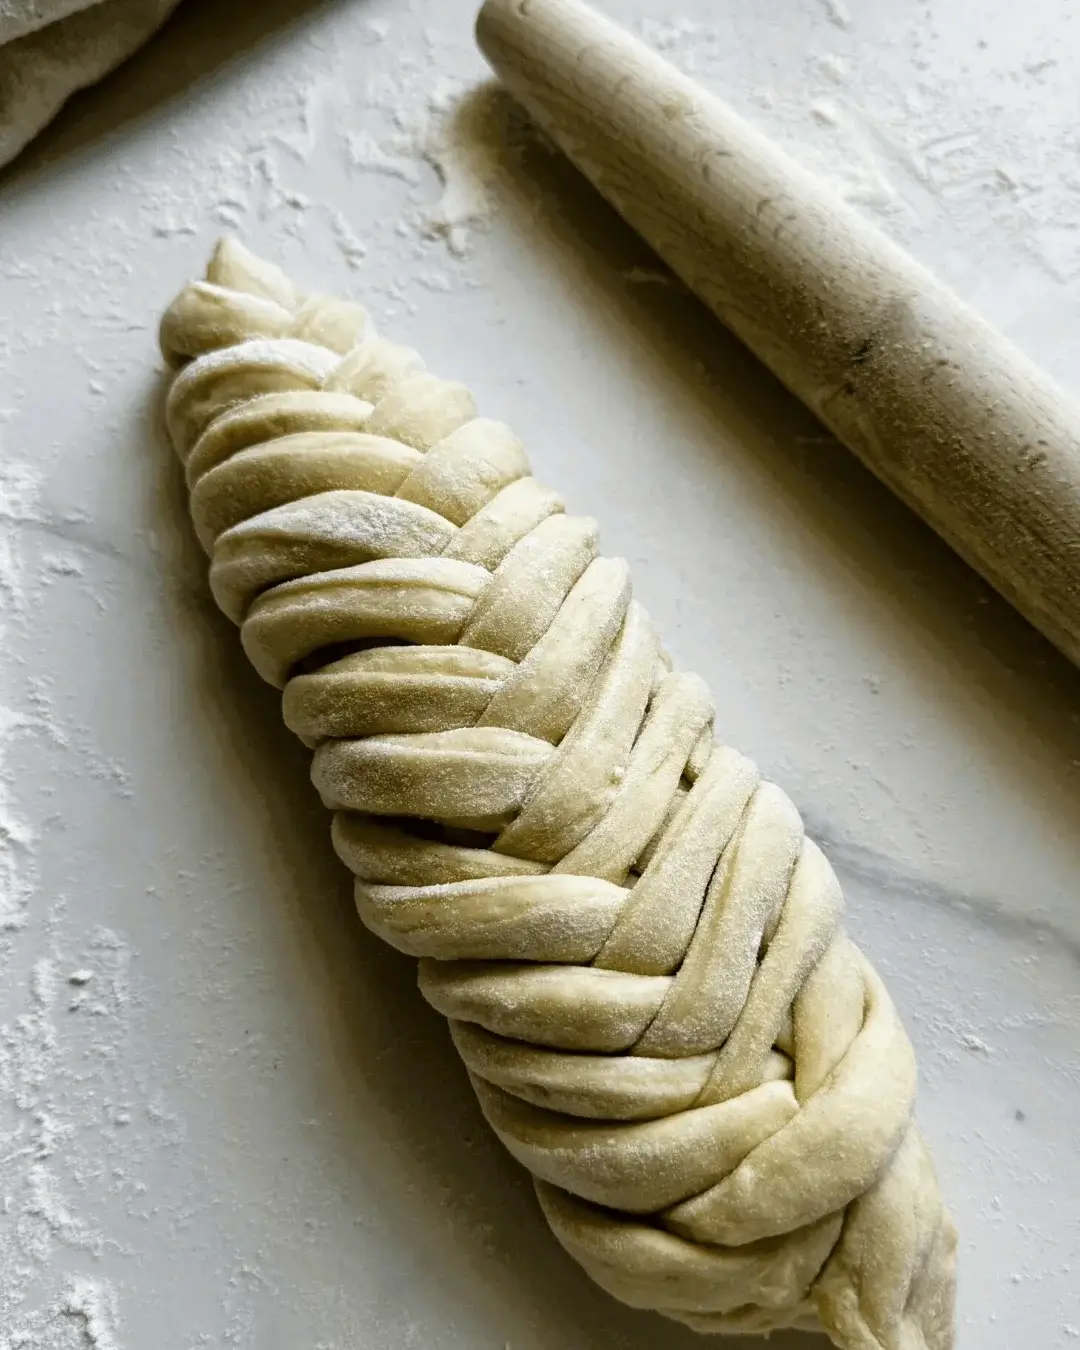
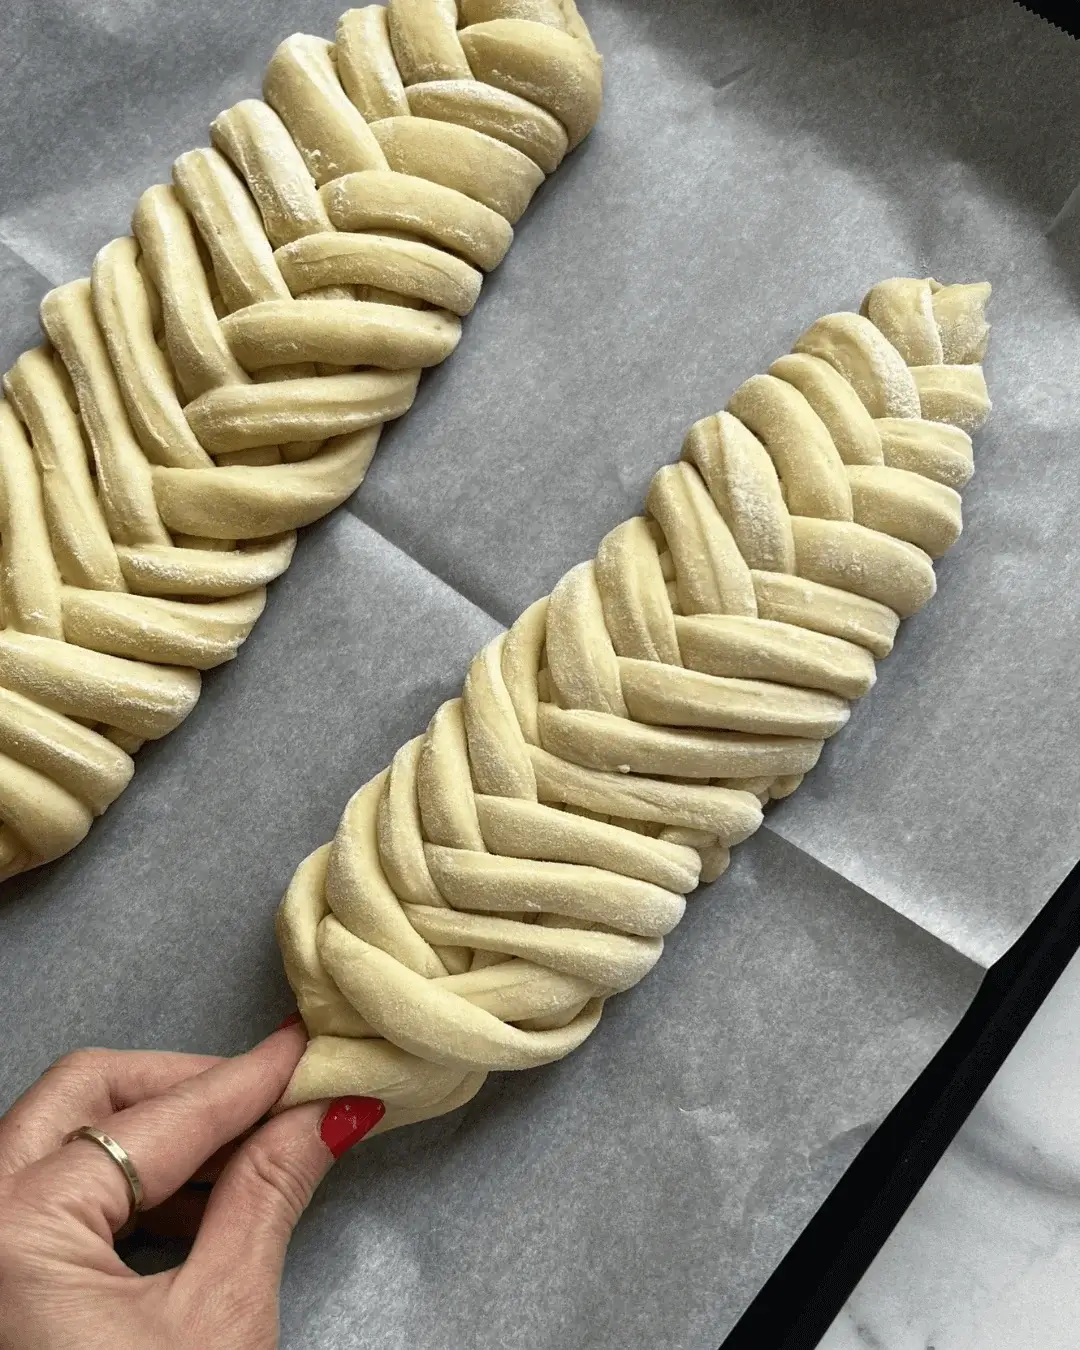
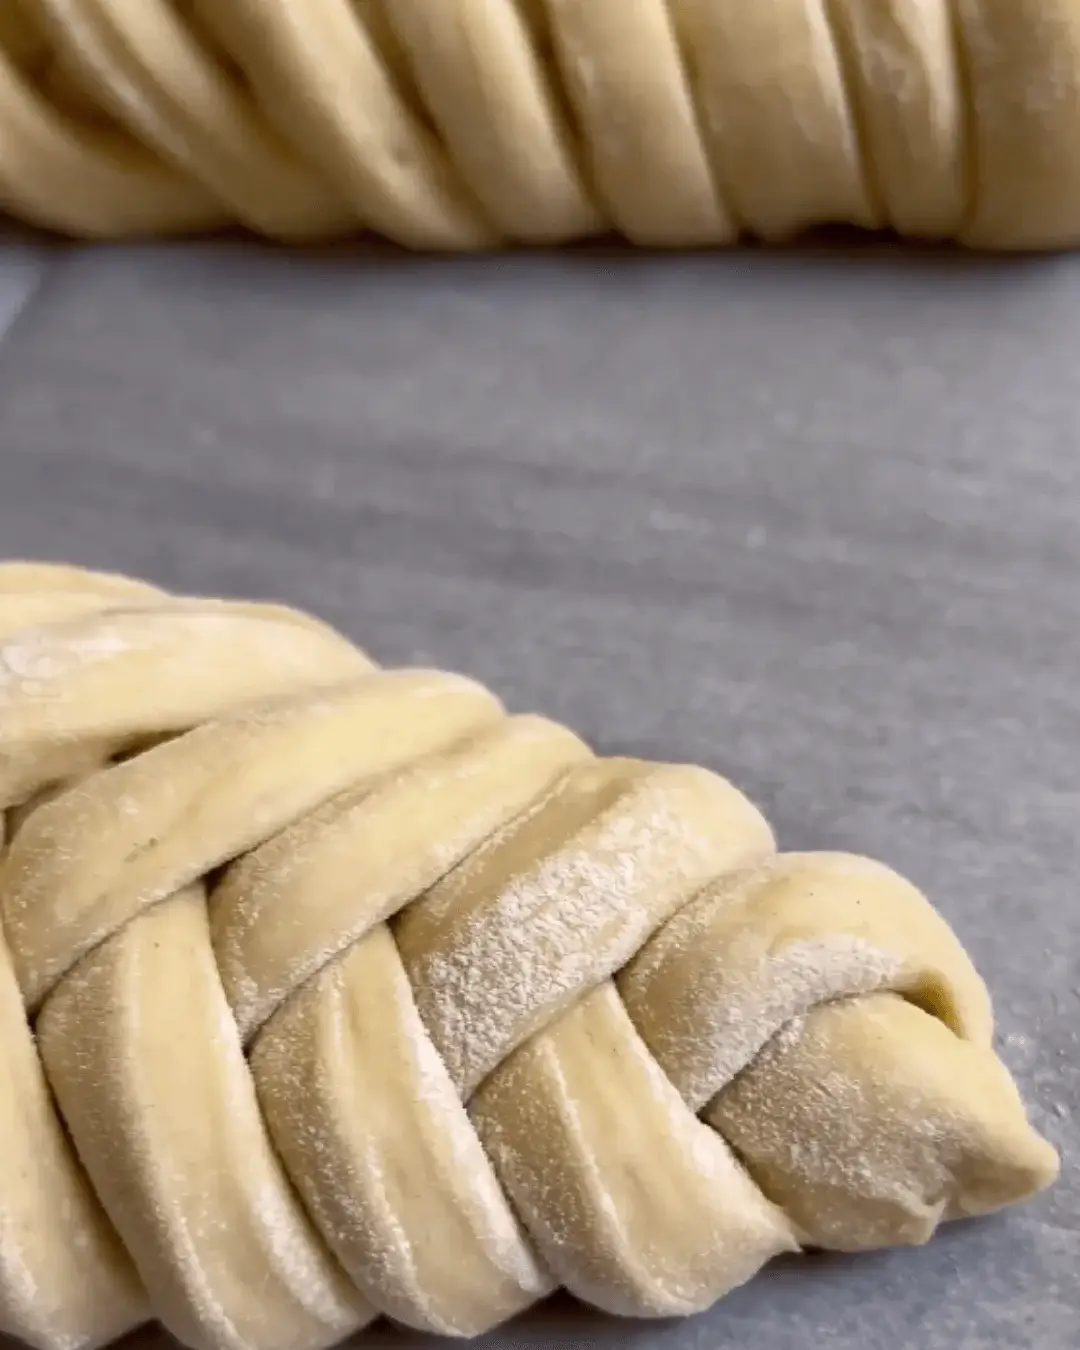
- Lightly dust the strips with flour using a fine sieve. Place a floured rolling pin or any long stick underneath two strips from each side to make an “X.” Continue with all the strips, pinching the ends to seal, carefully removing the challah from the rolling pin, and arranging it with your hands, pinching the ends well. Repeat with the remaining dough.
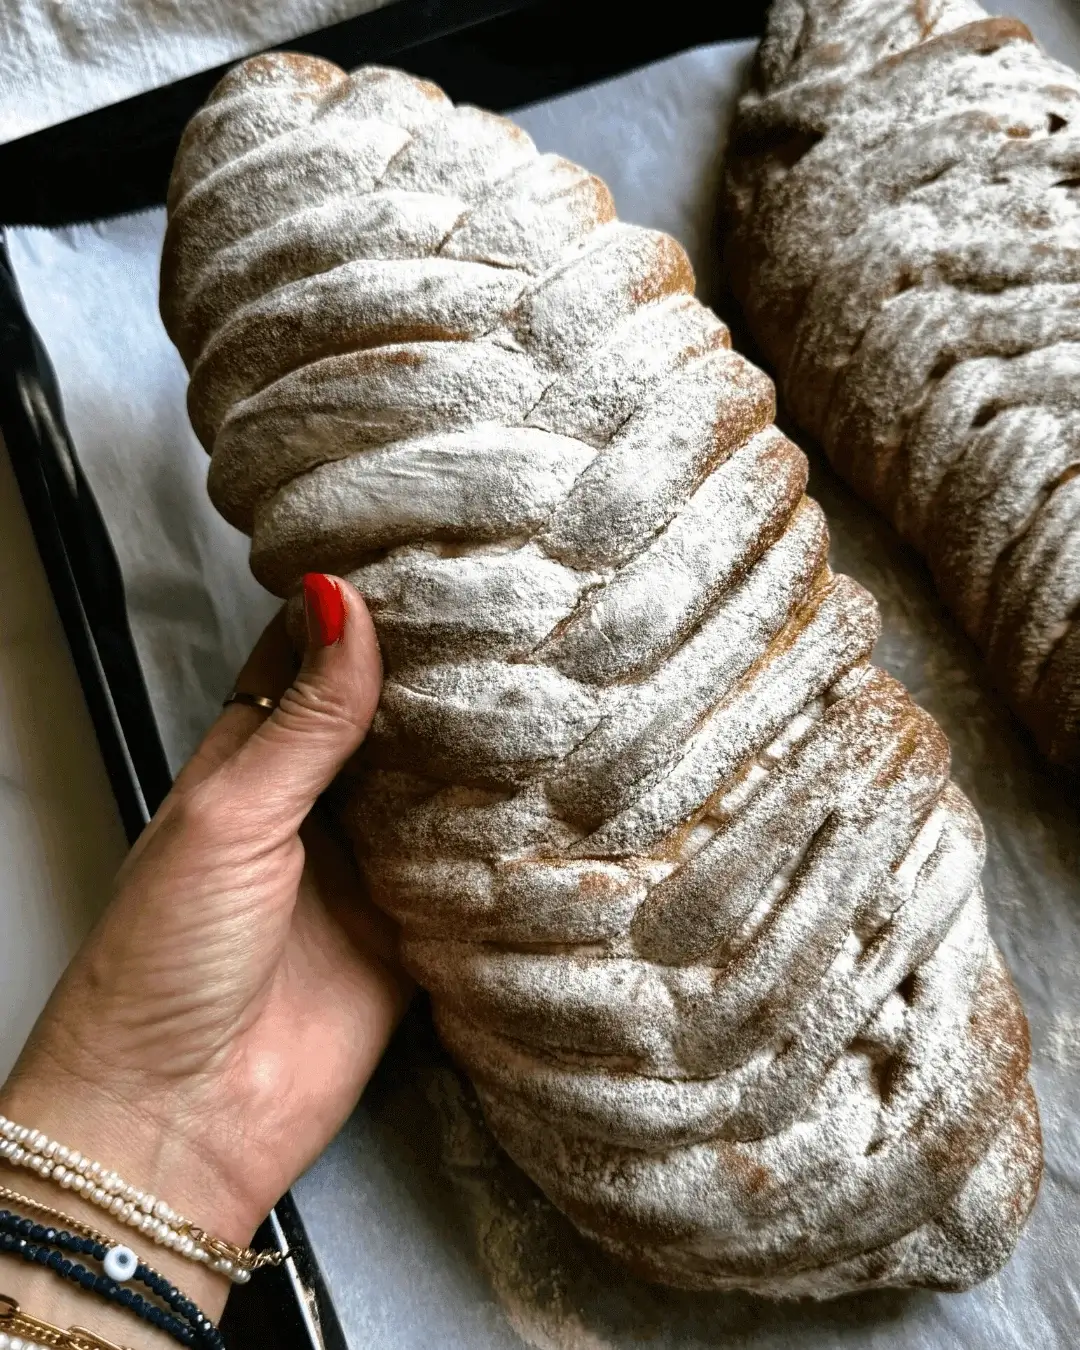
- Let the braided challah rise for about 45 minutes in a warm, humid place. After rising, dust lightly with flour or brush with a beaten egg and sprinkle with coarse salt.
- Bake in a preheated oven at 340°F (170°C) with convection for about 25 minutes, or until the challah is golden brown and looks nice on the bottom.
MY NOTES
FAQ
How do I know if the dough is kneaded enough?
To know if your dough is kneaded enough for the challah braiding, perform the “windowpane test.” Take a small piece of dough and gently stretch it between your fingers. If it forms a thin, translucent membrane without tearing, your dough is ready. If it tears easily, knead it for a bit longer. Properly kneaded dough will also be smooth, elastic, and should pull away from the sides of the bowl. It should bounce back slightly when pressed with your finger.
What should I do if my dough isn’t rising?
If your dough isn’t rising, first check that you used fresh yeast and that the water was at the right temperature (lukewarm, not hot or cold). Ensure the dough is in a warm, draft-free place; you can use an oven with the light on or a warm spot in your kitchen. If it’s still not rising, try moving the dough to a warmer location or waiting a bit longer. If all else fails, you might need to start over with fresh ingredients.
Can I let the dough rise overnight?
Yes, you can prepare the dough ahead of time and let it rise overnight. To do this, follow the recipe instructions and let the dough rise in the refrigerator instead of at room temperature. Cover the dough tightly with plastic wrap or a lid to prevent it from drying out. The cold environment will slow the rise, so in the morning, allow the dough to come to room temperature before shaping and baking.
Can I freeze the dough for later use?
Yes, you can freeze challah dough for later use. After kneading, divide the dough into portions and shape them into balls. Wrap each portion tightly in plastic wrap, then place them in a freezer-safe bag or container. Freeze for up to 3 months. To use, thaw the dough in the refrigerator overnight, then let it rise at room temperature for about an hour before shaping and baking. This method preserves the dough’s quality for future baking.
Best way to deflate the dough after rising?
To deflate dough after rising, gently press down on it with your hand or a fist to release the air bubbles. This step, called “punching down,” redistributes the yeast and prepares the dough for shaping. Avoid aggressive handling; a gentle touch is enough to let out the excess gas without overworking the dough. After deflating, shape the dough as desired and let it rise again if the recipe calls for a second proofing before baking.
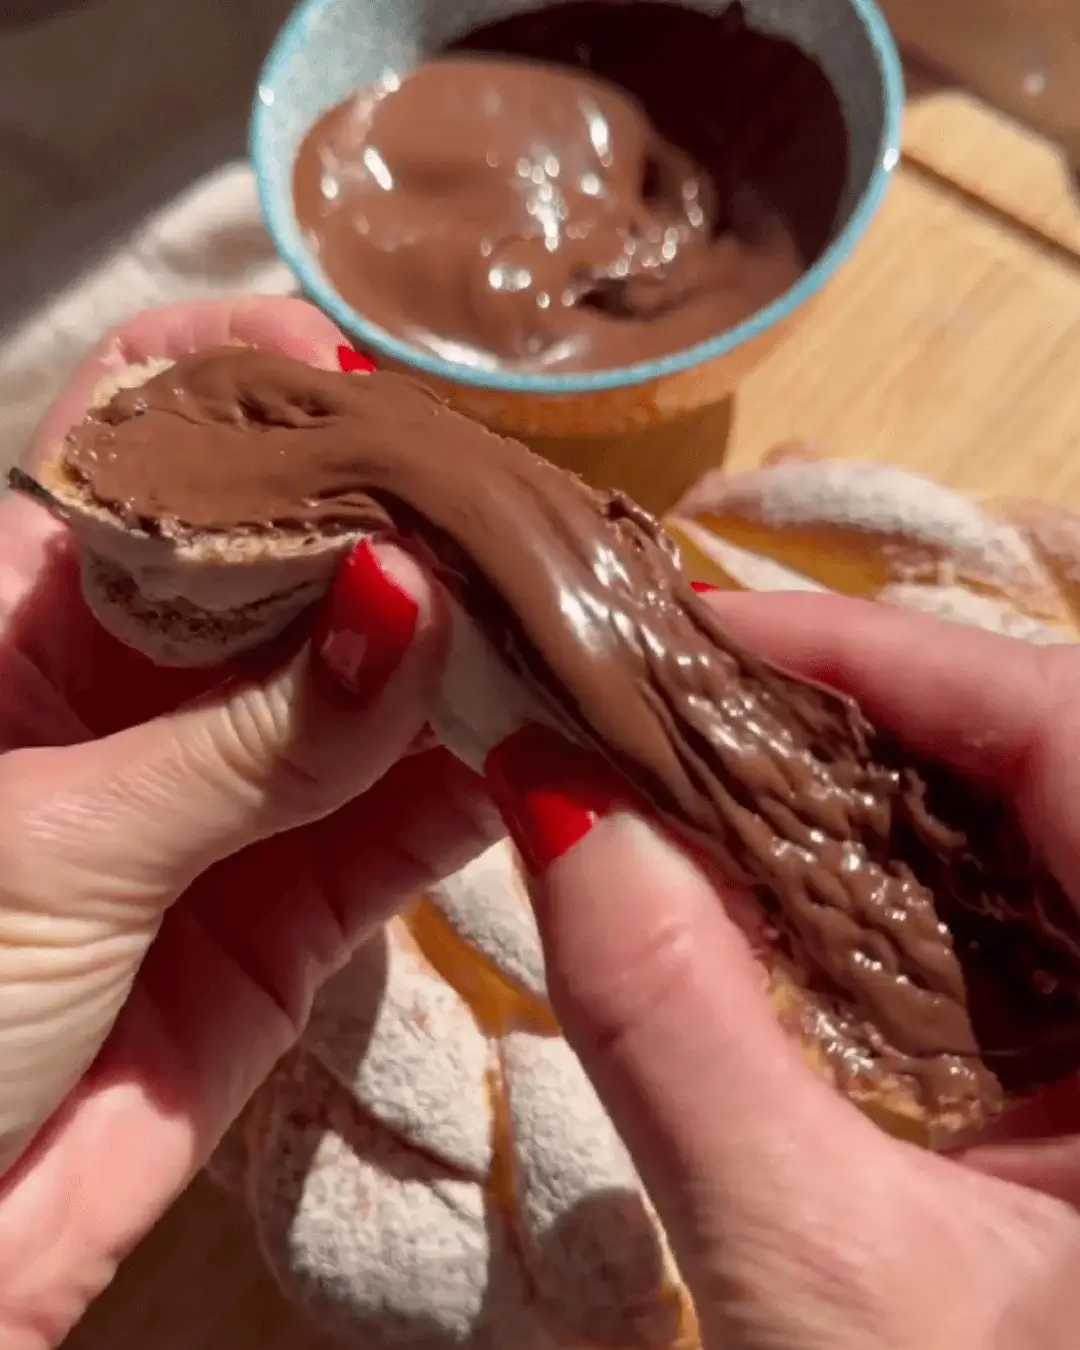
Can I add ingredients like raisins or chocolate chips?
Yes, you can add ingredients like raisins or chocolate chips to the challah dough. To do this, fold them in gently after the dough has been kneaded and before the first rise. If using raisins, you may want to soak them in warm water for 10 minutes to plump them up. For chocolate chips, simply mix them in until evenly distributed. Avoid overmixing, as it can toughen the dough. Then proceed with the recipe as usual.
How do I know when the challah is done baking?
To know when challah is done baking, check for a few key signs. The top should be golden brown and the internal temperature should reach 190°F (88°C). You can also tap the bottom of the challah; it should sound hollow if it’s done. Finally, the sides should be firm and the bread should not feel doughy. If needed, bake for a few more minutes, checking frequently to avoid overbaking.
Common mistakes to avoid when making challah
Common mistakes to avoid when making challah include using cold water, which can slow down the yeast, and not kneading the dough enough, which can lead to a dense texture. Ensure that the dough rises in a warm, draft-free environment; too cold or too hot can affect the rise. Overworking or underworking the dough when braiding can also result in uneven texture. Make sure to deflate the dough gently after rising to avoid a heavy bread. Finally, check the doneness by tapping the bottom of the loaf for a hollow sound and using a thermometer to ensure it reaches 190°F (88°C).
How do I store leftover challah?
To store leftover challah, let it cool completely before wrapping. For short-term storage, keep it at room temperature in a paper bag or wrapped in plastic wrap. For longer storage, freeze it in an airtight container or plastic bag for up to 3 months. To thaw, leave it at room temperature or warm it in the oven at 300°F (150°C) for 10–15 minutes. You can also slice it before freezing for easy use in the future.
Different challah braiding technique for this recipe
For this challah recipe, you can explore various braiding techniques. The classic 3-strand braid involves placing three strips of dough side by side, crossing the right strand over the center, then the left over the new center, and repeating until you reach the end. For a more elaborate look, try the 6-strand braid by arranging six strips into two groups of three, braiding them in a specific over-under pattern. Another option is the twist braid, where you twist two strips of dough around each other for a spiral effect. Experiment with these methods to create different shapes and designs for your challah.