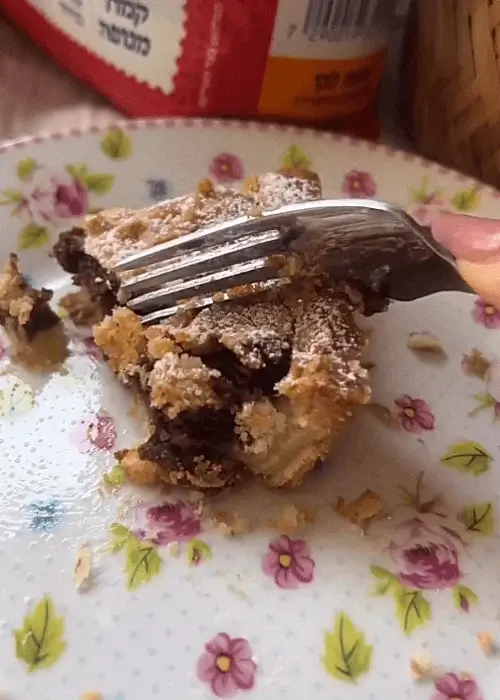
Crispy Chocolate Tart with Buttery Streusel
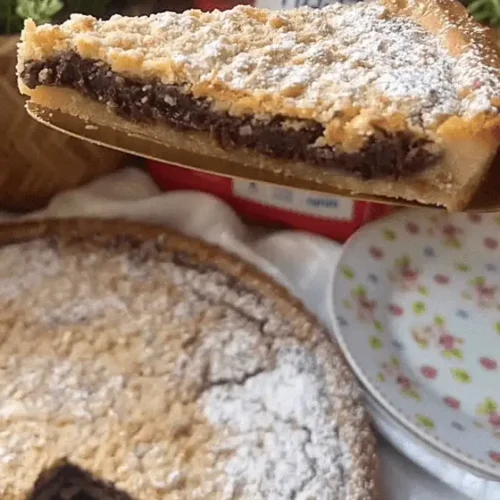
Watch the Full Step-by-Step
- Microwave-safe bowl
- Box grater
- Fine-mesh sieve
- Chef's knife
- Kitchen scale
- 10- to 11-inch/25- to 28-centimeter tart pan
INGREDIENTS
Crust:
- 2½ cups/300 grams all-purpose flour
- ¾ cup + 1 tablespoon/100 grams powdered sugar
- 7 ounces/200 grams cold unsalted butter, cubed
- 1 large egg
- 1 teaspoon vanilla paste or vanilla extract
Filling:
- 5.3 ounces/150 grams dark chocolate, finely chopped
- 5.3 ounces/150 grams white chocolate, finely chopped
- 3.5 ounces/100 grams unsalted butter
- ¾ cup/150 grams sugar
- 2 large eggs
- ½ cup/60 grams all-purpose flour

INSTRUCTIONS
- Heat the oven to 350°F/170°C.
- Make the crust: In the bowl of a stand mixer fitted with the paddle attachment, combine the flour, powdered sugar and butter. Mix on medium speed until the mixture forms coarse, crumbly pieces.
- Add the egg and vanilla and mix just until the dough comes together. If the dough feels soft, refrigerate for 15 minutes.
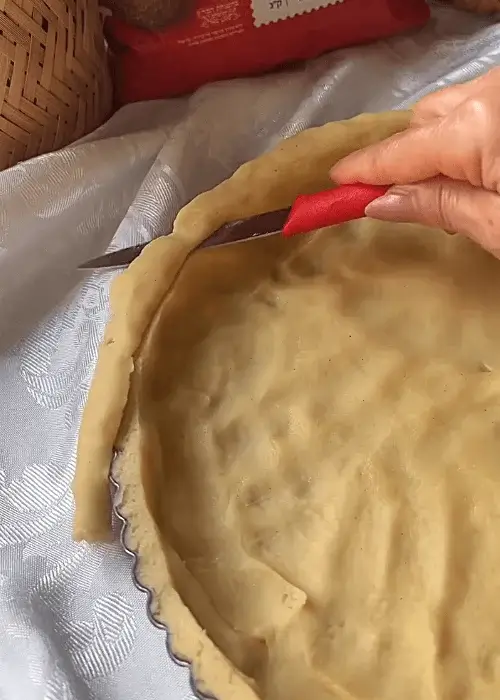
- Press the dough evenly into a 10- to 11-inch/25- to 28-centimeter tart pan, covering the bottom and sides. Press firmly into the corners to create an even, thin crust.
- Trim the excess dough from the edges. Gather the scraps into a ball and freeze. Freeze the tart shell until firm, at least 30 minutes or overnight.
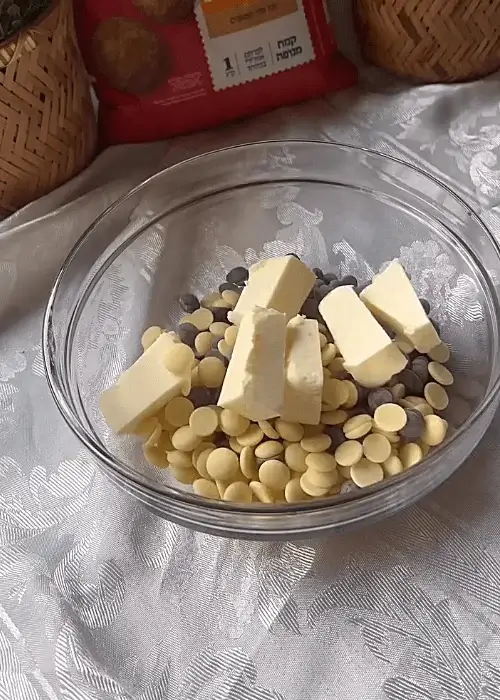
- Make the filling: Combine the dark chocolate, white chocolate and butter in a microwave-safe bowl. Microwave in 30-second intervals, stirring between each, until melted and smooth. Let cool slightly.
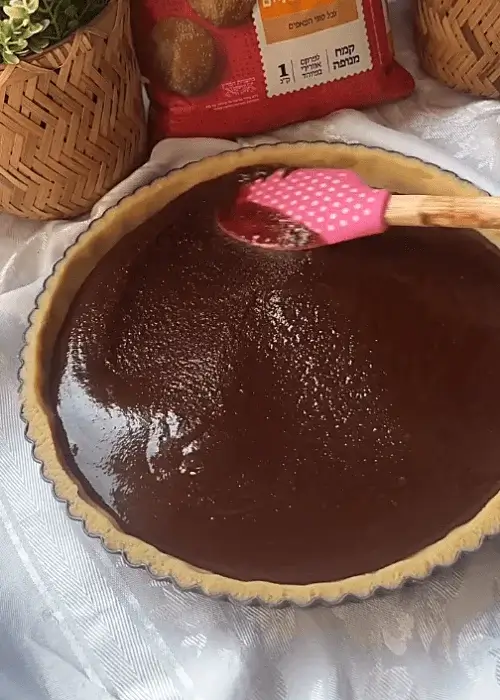
- Whisk in the sugar, then whisk in the eggs one at a time. Add the flour and stir just until combined.
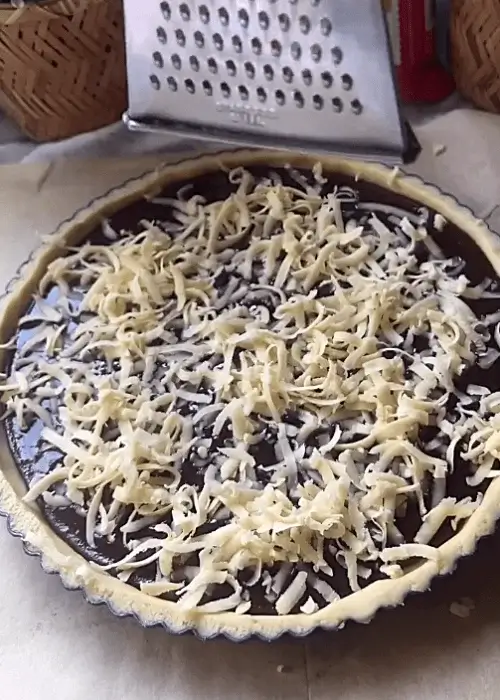
- Pour the filling into the frozen tart shell. Coarsely grate the frozen pastry scraps over the filling.
- Bake until the edges are set and the center is just slightly soft, about 40 minutes.
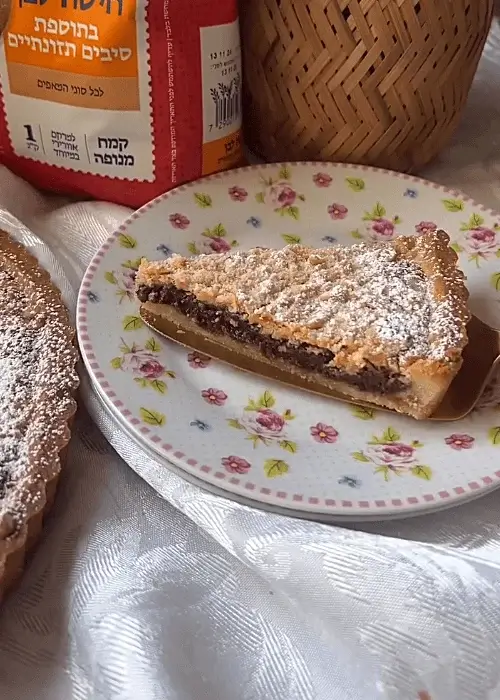
- Let cool completely, then dust with powdered sugar. Serve at room temperature.
- Store in an airtight container at room temperature.
FAQ
What makes this chocolate tart different from a traditional one?
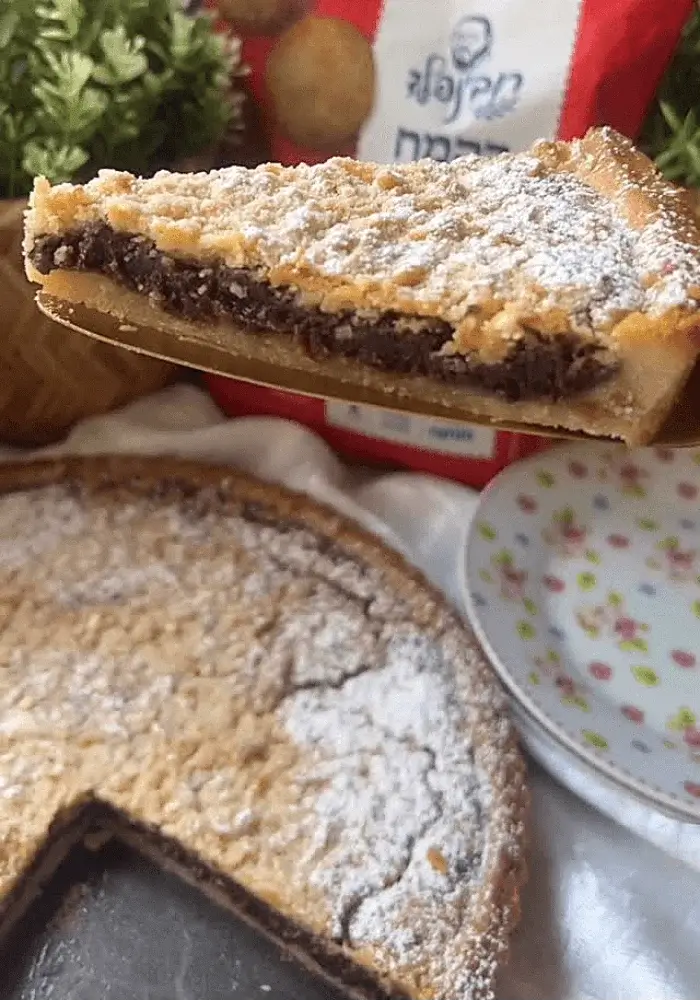
This chocolate tart differs from a traditional one because it combines a crisp pastry crust with a rich filling made from both dark and white chocolate. The filling is not a classic ganache or custard; it contains melted chocolate, butter, sugar, eggs and flour, which gives it a denser, brownie-like texture. The frozen pastry scraps are also grated over the filling before baking, creating a crisp, buttery streusel-like topping.
Because the topping is made from pastry dough rather than a separate crumb mixture containing cocoa, it is more accurate to describe it as pastry streusel. The combination of textures is the defining feature of this chocolate tart: crisp pastry, creamy-rich chocolate filling and a delicate, crunchy topping.
How do I get clean slices when serving a chocolate tart?
Allow the chocolate tart to cool completely before slicing. The filling needs time to firm up after baking, and cutting while it is still warm can produce soft, uneven slices. Use a sharp chef’s knife and make a decisive cut through the filling and crust rather than repeatedly sawing back and forth. For especially clean slices, wipe the knife with a clean, slightly damp towel between cuts.
If the tart has been refrigerated, let it sit at room temperature before serving so the filling is not overly firm. The tart should be fully cooled but not necessarily cold when sliced. A properly baked center that remains slightly soft in the oven will firm as it cools, making it easier to portion cleanly.
Can I prepare the chocolate tart crust ahead of time?
Yes. The crust for this chocolate tart can be prepared a day ahead and kept frozen until you are ready to bake it. After pressing the dough into the tart pan, trim the edges and save the excess dough for the topping. Shape the scraps into a ball and freeze them separately. The tart shell should also be frozen until firm.
Freezing the shaped crust helps it retain its structure during baking and reduces the risk of the sides shrinking or collapsing. When you are ready to bake, there is no need to thaw the shell first. Pour the prepared chocolate filling directly into the frozen crust, grate the frozen pastry scraps over the top and bake according to the recipe.
What is the best way to press the crust into the tart pan?
Press the pastry into the tart pan in an even layer, starting with the bottom and then working the dough up the sides. Use your fingertips to distribute the dough rather than pressing a large amount into one area and spreading it outward. Pay particular attention to the corners where the bottom meets the sides, since excess dough tends to collect there and can create a thick rim.
The goal is a relatively thin, uniform crust that supports the filling without overpowering it. Once the dough is evenly distributed, use a knife to trim the excess from the top edge. Any trimmed dough can be frozen and grated over the filling later. For this chocolate tart, an evenly pressed crust also helps the tart bake uniformly and gives the finished dessert a clean appearance.
Why does the tart crust need to be frozen before baking?
Freezing the crust helps the chocolate tart maintain its shape and gives the butter in the pastry time to firm up before it enters the oven. Cold pastry is less likely to soften, shrink or slide down the sides of the tart pan during baking. This is particularly important because the crust is pressed directly into the pan rather than rolled and blind-baked.
Freezing also makes the pastry scraps much easier to grate over the chocolate filling. The frozen dough produces distinct shreds that remain recognizable during baking and develop crisp edges. For the best result, freeze the shaped shell until completely firm, for at least 30 minutes or overnight. The frozen pastry can then go directly into the oven after being filled.
Can I prepare the filling ahead of time?
The filling is best prepared shortly before assembling and baking the chocolate tart. The melted chocolate, butter, sugar, eggs and flour form a batter that begins to change in consistency as it sits, particularly as the chocolate and butter cool and firm. Preparing it immediately before filling the frozen tart shell keeps the mixture fluid and easy to spread evenly.
The crust and pastry scraps, however, can be prepared ahead and frozen. This makes the recipe easier to organize because the pastry components can be completed the day before. When ready to bake, prepare the filling, pour it into the frozen shell, grate the frozen scraps over the top and bake.
Can I use a food processor to make the crust for this chocolate tart?
Yes. A food processor can be used to make the pastry crust, although the original method uses a stand mixer with a paddle attachment. Add the flour, powdered sugar and cold cubed butter to the processor and pulse until the mixture resembles coarse crumbs. Add the egg and vanilla and pulse just until the dough comes together. Avoid processing continuously, since overmixing can develop gluten and make the crust less tender.
If the dough becomes soft from the heat generated by the processor, refrigerate it for about 15 minutes before shaping. Once the dough is ready, press it evenly into the tart pan and freeze it before filling. The same chilling and freezing steps are important regardless of the mixing method because they help the crust hold its shape during baking.
How do I prevent the chocolate tart crust from becoming too thick?
The key is to press the dough evenly into the tart pan, paying particular attention to the area where the bottom meets the sides. Press the dough firmly into that corner rather than allowing extra dough to accumulate there. The original method specifically recommends keeping the crust thin and even because a thick edge can become heavy and distract from the chocolate filling.
After the dough is pressed into the pan, use a knife to trim excess pastry from the rim. Do not discard those scraps; freeze them and grate them over the filling before baking. An evenly distributed crust also helps the chocolate tart bake more consistently, giving you a crisp base and properly cooked edges without overbrowning the pastry.
Can I make the chocolate tart without a stand mixer?
Yes. A stand mixer makes the crust convenient to prepare, but it is not essential. You can mix the flour, powdered sugar and cold cubed butter by hand using a pastry cutter or your fingertips until the mixture resembles coarse crumbs. Work quickly so the butter does not become warm. Add the egg and vanilla and mix just until the dough comes together.
Avoid kneading the pastry because excessive mixing develops gluten and can make the crust tougher. If the dough becomes soft while you are working with it, refrigerate it for about 15 minutes before pressing it into the tart pan. The most important factor is keeping the butter and dough cool rather than using a particular mixing method.
Can I use only dark chocolate instead of dark and white chocolate?
You can, but the finished chocolate tart will be noticeably different from the original recipe. The combination of dark and white chocolate creates a balance between intense cocoa flavor and the sweetness and creaminess of white chocolate. Replacing the white chocolate entirely with additional dark chocolate will produce a deeper, less sweet filling with a stronger chocolate flavor.
Because white chocolate contains a substantial amount of cocoa butter and sugar but no cocoa solids, replacing it changes both the flavor and the composition of the filling. If you make this substitution, use an equivalent weight of dark chocolate rather than changing the total amount of chocolate. Choose a dark chocolate in the roughly 60 to 70 percent cocoa range for a balanced result.
Can I freeze the finished chocolate tart?
Yes, the finished chocolate tart can be frozen, although the pastry may lose some of its crisp texture after thawing. For the best results, allow the tart to cool completely before freezing. Wrap it tightly to protect it from freezer air and moisture, then place it in an airtight freezer-safe container or bag. Thaw the tart in the refrigerator or at room temperature while keeping it covered.
Once thawed, allow it to come to room temperature before serving. The original recipe specifically recommends freezing the unbaked tart shell and pastry scraps, which is the preferred make-ahead method because it preserves the texture of the pastry more effectively. If your goal is maximum crispness, prepare and freeze the components before baking rather than freezing the completed chocolate tart.
How do I know when the chocolate tart is fully baked?
The chocolate tart is ready when the edges of the filling are set but the center remains slightly soft. The recipe calls for approximately 40 minutes at 350°F/170°C, but the visual cues are more reliable than time alone because ovens and tart pans vary. The filling should no longer look liquid around the edges, while the center can retain a slight softness when the pan is gently moved.
Avoid waiting until the entire surface is completely firm in the oven. The filling will continue to set as the tart cools. Overbaking can make the chocolate filling firm, dry or cakey instead of rich and tender. Once the edges are set and the center is just slightly soft, remove the tart and allow it to cool completely before serving.
How should I store this chocolate tart?
Once completely cooled, the chocolate tart can be stored in an airtight container at room temperature, as specified in the recipe. Keeping it covered protects the pastry from drying out and prevents the tart from absorbing odors or moisture from the surrounding environment. Make sure the tart has cooled completely before placing it in an airtight container, since trapped heat can create condensation and soften the crust and pastry topping.
The tart is best served at room temperature because the chocolate filling is more tender and flavorful when it is not chilled. If you prefer to refrigerate it, allow it to return to room temperature before serving so the butter and chocolate in the filling can soften. Avoid leaving the tart uncovered for extended periods, as the pastry will gradually lose its crispness.
How thick should the pastry crust be?
The crust should be thin and even enough to provide a crisp base without overwhelming the chocolate filling. The original preparation method specifically emphasizes pressing the dough firmly into the corners where the bottom meets the sides because dough tends to accumulate in that area. There is no need to measure the thickness with a ruler; focus on creating a consistent layer across the bottom and sides.
Uneven areas can lead to some sections becoming overly thick while thinner areas brown more quickly. Press the dough gradually with your fingertips and redistribute it if you notice thicker spots. Trimming the top edge after shaping also removes excess pastry and leaves a cleaner, more even rim for the finished chocolate tart.