No Bake Peanut Butter Chocolate Bars

Watch the Full Step-by-Step
- Food processor
- 8-inch/20 cm square baking pan
- Skewer
INGREDIENTS
1st layer:
- 1/2 cup/70 grams cashews
- 1/2 cup/45 grams rolled oats
- 10 pitted Medjool dates
- 1 tablespoon unsweetened cocoa powder
- 1 –2 tablespoons oat milk
2nd layer:
- 5 pitted Medjool dates
- 1/2 cup/130 grams peanut butter
- 1/2 cup/120 grams oat milk
- 1 tablespoon coconut oil
3rd layer:
- 5 pitted Medjool dates
- 1 tablespoon unsweetened cocoa powder
- 1 tablespoon peanut butter
- 1/2 cup/120 grams coconut cream
INSTRUCTIONS
1st layer:
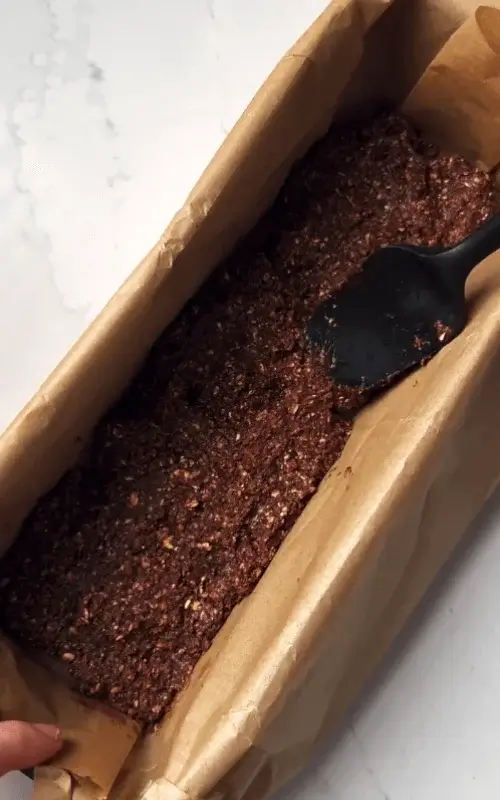
- Place the cashews, rolled oats, 10 pitted dates, cocoa powder, and 1 tablespoon of milk in a blender or food processor. Process until a uniform, slightly sticky dough forms. Press the mixture firmly and evenly into an 8-inch/20 cm square pan lined with parchment paper so the base is compact and level.
2nd layer:
- Combine 5 pitted dates, 1/2 cup peanut butter, 1/2 cup milk, and coconut oil in the blender. Process until completely smooth and creamy, scraping down the sides once. Gently pour the peanut butter cream over the pressed base and spread it evenly with an offset spatula, keeping the layer level.
3rd layer:
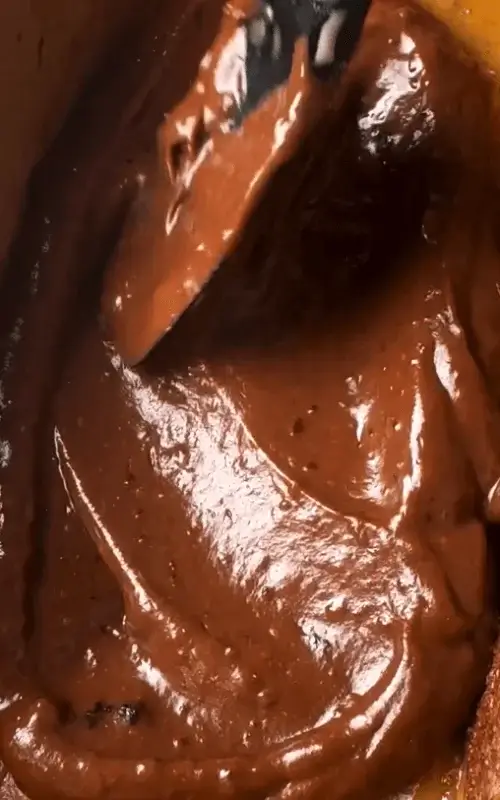
- Add 5 pitted dates, cocoa powder, 1 tablespoon peanut butter, and coconut cream to the blender. Blend until silky and chocolatey. Pour the chocolate cream over the peanut layer and smooth it to an even surface.
Finishing:
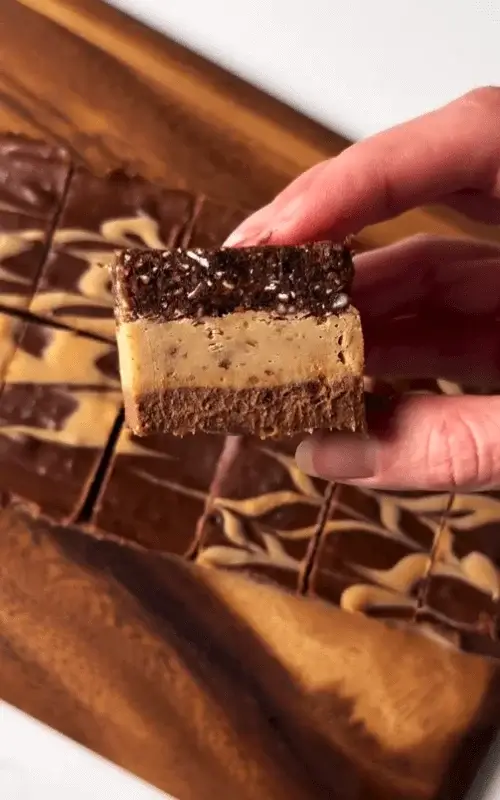
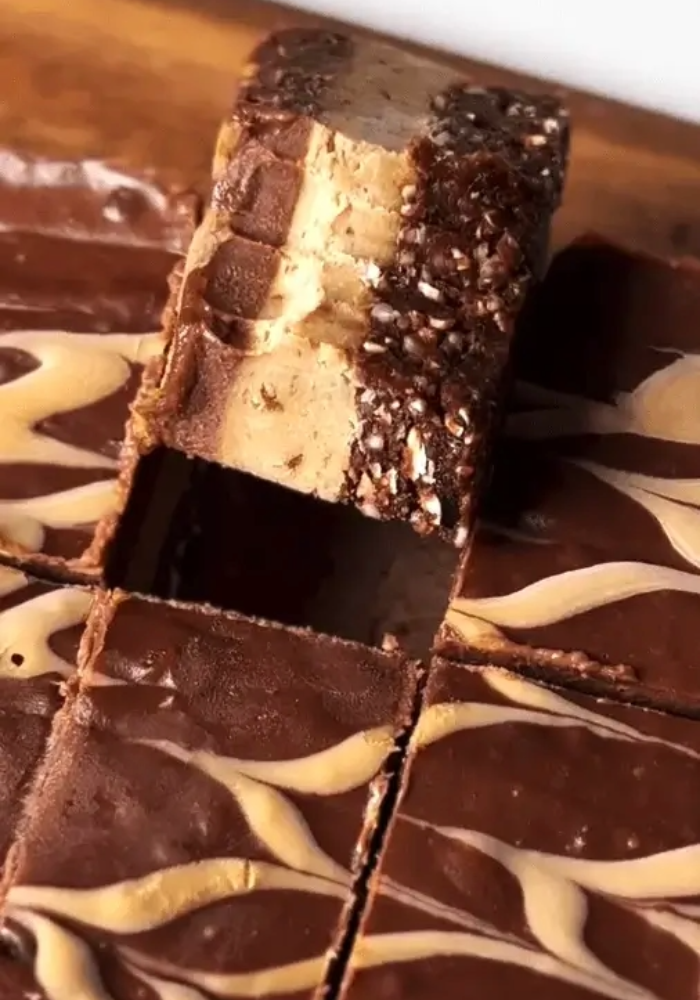
- Warm a little peanut butter so it is pourable and drizzle it over the top. Use a skewer or toothpick to create decorative swirls if desired. Cover the pan and transfer to the freezer for at least 2 hours to set before slicing. For easy serving, place each piece in a paper liner. Store in the freezer.
FAQ
How to slice these no bake peanut butter chocolate bars
It’s important that they are fully set in the freezer for at least two hours. Remove the pan from the freezer and use a sharp knife, preferably warmed under hot water and wiped dry before cutting. Cut slowly with gentle pressure, cleaning the knife between slices if needed. This prevents the layers from smearing or sticking. Using parchment paper in the pan also helps lift the bars out easily, reducing breakage and preserving the smooth layered appearance of the no bake peanut butter chocolate bars.
Can the bars be made without a sweetener?
This recipe can rely solely on the natural sweetness of dates. Choose unsweetened cocoa powder and natural peanut butter without added sugar. If additional sweetness is desired, consider using a small amount of a sugar-free sweetener like erythritol, monk fruit, or stevia, but adjust gradually to avoid altering the texture. Blending the ingredients thoroughly ensures that the mixture remains smooth and cohesive.
Can I add toppings or mix-ins to no the bake peanut butter chocolate bars?
Chopped nuts like almonds, cashews, or pecans can be folded into the base layer. Shredded coconut, mini chocolate chips, or dried fruit can be sprinkled over the top layer before freezing. For a decorative touch, drizzle melted dark chocolate or peanut butter over the finished bars. Make sure any toppings are lightly pressed into the surface so they adhere as the bars set in the freezer, ensuring they remain intact when sliced.
Are the bars suitable for meal prep or lunchboxes?
These bars are excellent for meal prep or lunchboxes because they are naturally portioned and freezer-stable. Individually wrapped or placed in paper liners, they can be stored in the freezer and thawed slightly before eating. They provide a convenient snack or dessert with protein from the peanut butter and fiber from the dates and oats. Because they do not require baking, you can make multiple batches at once, and the bars maintain their layered structure and creamy texture without refrigeration until ready to serve.
Can I use different types of dates in no bake peanut butter chocolate bars?
You can use other varieties of dates, such as Deglet Noor, in place of Medjool dates. Keep in mind that Medjool dates are softer and sweeter, providing a smoother, stickier texture that helps bind the layers. If using firmer or less sweet dates, soak them in warm water for 10 to 15 minutes to soften, then drain thoroughly before blending. This ensures the no bake peanut butter chocolate bars maintain a cohesive, smooth consistency without becoming dry or crumbly. Adjust the number of dates slightly if needed for sweetness.
Can I make the bars with a chocolate base?
You can combine oats, cocoa powder, dates, and a little coconut oil or nut butter for richness. Keep the texture sticky enough to support the upper layers by using soft dates and blending until uniform. This variation maintains the layered structure and adds a deeper chocolate flavor, while still keeping the dessert naturally sweet and no bake.
How do I prevent the layers from mixing together?
It’s crucial to chill or freeze each layer slightly before adding the next. After pressing the base layer into the pan, you can refrigerate or briefly freeze it for 10–15 minutes to firm it. Pour the peanut butter layer gently on top, spreading evenly without pressing too hard, and then repeat the chilling step if desired. The final chocolate layer should be poured carefully over the peanut butter layer. Using a spatula to smooth each layer and patience while the bars set ensures the distinct layers in the no bake peanut butter chocolate bars remain clean and visually appealing.