Pull-Apart Honey Challah Recipe
Watch the Full Step-by-Step
- Large mixing bowl
- Kitchen scale
- 10-inch/26 cm round cake pans
- Wire rack
INGREDIENTS
- 3 tablespoons honey
- 2 tablespoons boiling water
- Coarse sugar
- Sesame seeds
- Sliced almonds
- 1 large egg
- 1 tablespoon water
Dough:
- 7½ cups/1 kilogram bread flour
- 1.4 ounces/40 grams fresh yeast, or 4½ teaspoons active dry yeast
- 1/4 cup/50 grams sugar
- 3/4 cup/180 milliliters oil
- 1/3 cup/100 grams honey
- 2 cups/500 milliliters lukewarm water
- 1 tablespoon/18 grams salt
INSTRUCTIONS
- In the bowl of a stand mixer fitted with the dough hook, combine the flour, yeast, and sugar. Mix briefly on medium speed to blend the dry ingredients. With the mixer running, slowly pour in the oil, honey, and water. Once incorporated, add the salt and knead for about 15 minutes, or until the dough is smooth, elastic, and slightly tacky.
- Transfer the dough to a large, lightly oiled bowl. Cover with a clean towel or plastic wrap and let rise in a warm spot until doubled in volume, about 1 hour.
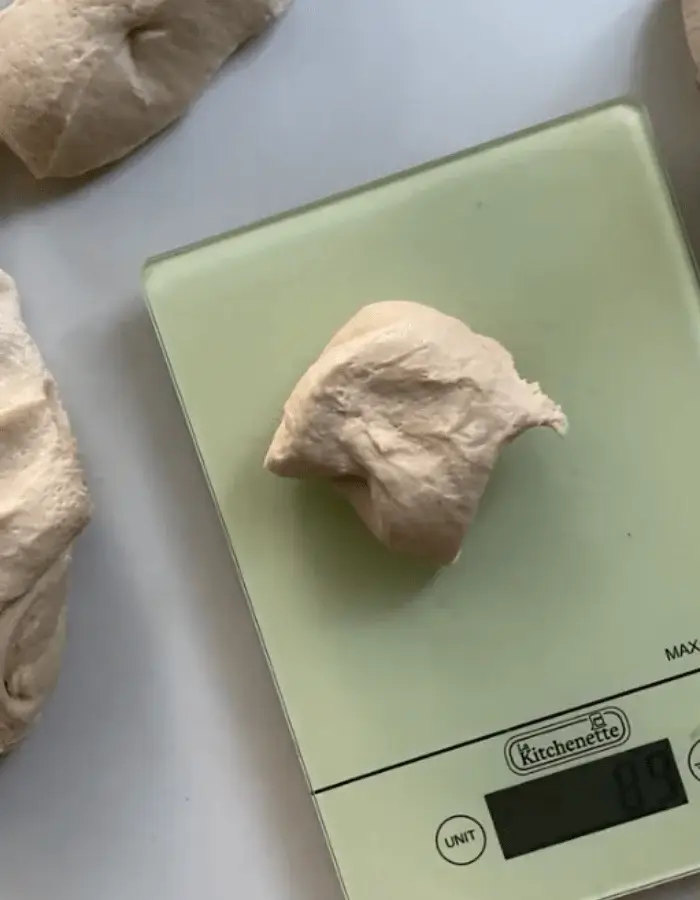
- After the dough has risen, turn it out onto a lightly oiled surface. Divide into 20 equal portions, about 2.8 ounces/80 grams each. Roll each portion into a smooth ball.
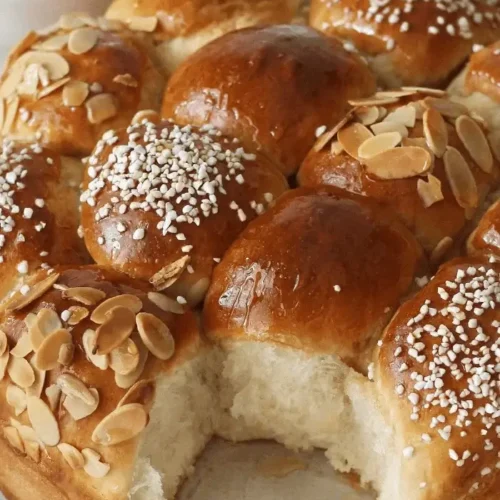
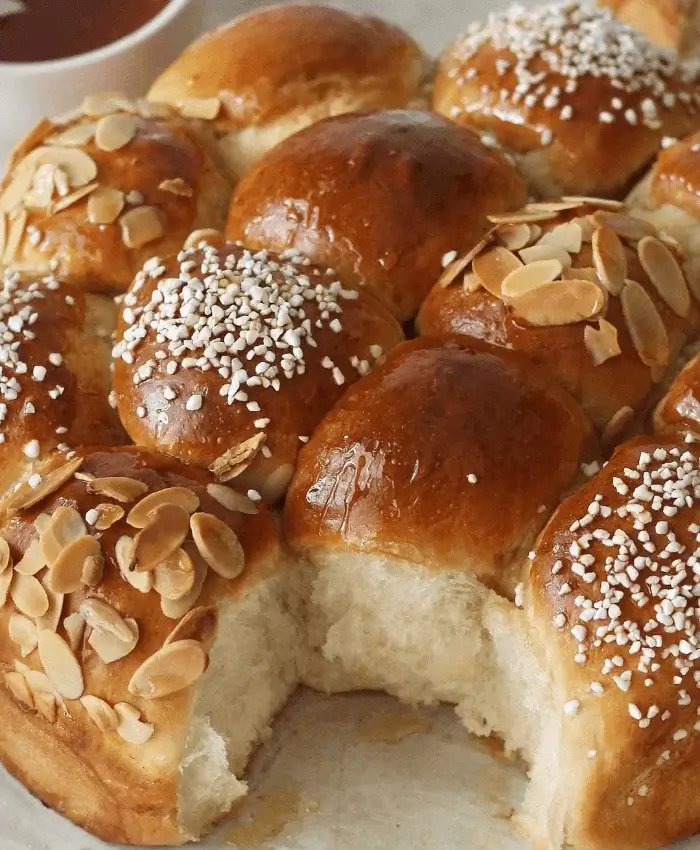
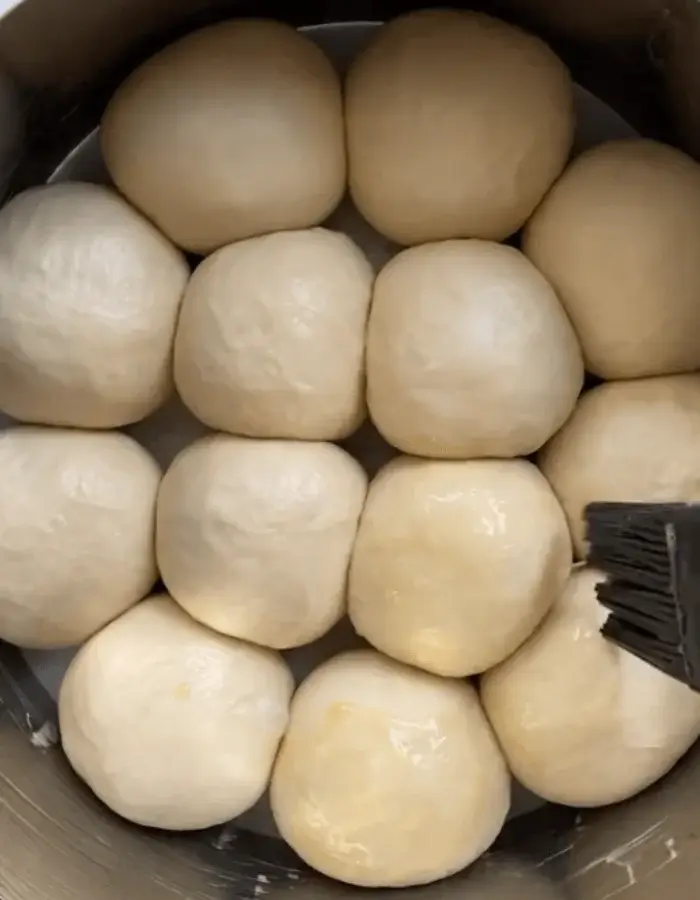
- Arrange the dough balls in two 10-inch/26 cm round cake pans or ring molds, leaving a little space between them for expansion. Cover and let rise until puffed and nearly doubled, 30 to 40 minutes.
- Meanwhile, heat the oven to 350°F/175°C with convection (or 375°F/190°C without convection).
- In a small bowl, whisk together the egg and water. Gently brush the tops of the risen dough balls, then sprinkle with coarse sugar, sesame seeds, or sliced almonds, or a mix of all three.
- Bake for 25 to 30 minutes, or until deeply golden and cooked through. The bottom of the loaves should sound hollow when tapped.
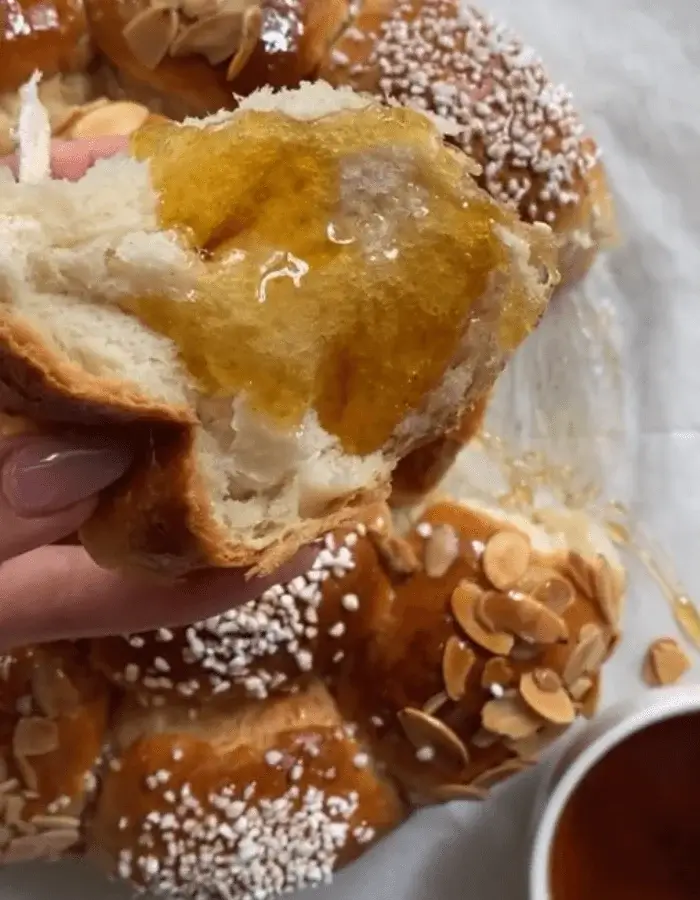
- Remove from the oven and immediately brush the warm challahs with diluted honey. Let cool completely in the pans on a wire rack.
- Once cooled, store in an airtight container or wrap tightly to prevent drying.
FAQ
Can I prepare the dough for this honey challah recipe in advance?
You can prepare the dough for this honey challah recipe a day in advance. After kneading, let it rise once as usual, then punch it down and refrigerate the dough overnight in a lightly greased bowl, tightly covered. The slow cold fermentation helps develop flavor. The next day, bring the dough to room temperature, shape it into balls, and allow a full second rise before baking.
Can I make this honey challah recipe without eggs?
It is possible to make the honey challah recipe without eggs, though the texture and color will differ slightly. Omit the egg wash before baking and use a mixture of plant-based milk and maple syrup or a bit of oil to mimic the golden sheen. To replace the egg in the dough (if your variation includes it), use 1/4 cup unsweetened applesauce or aquafaba per egg.
What is the best way to shape this challah?
This honey challah recipe uses a pull-apart method, shaping the dough into small balls rather than traditional braids. Each ball weighs about 80 grams and is arranged in a round pan with space to expand. This results in a visually appealing, flower-like pattern when baked. If you prefer a twisted round challah, you can roll the dough into long ropes and coil them into a spiral, but the pull-apart method is simpler and aligns with the festive, symbolic round shape traditionally used for Rosh Hashanah.
Can I use all-purpose flour instead of bread flour?
You can substitute all-purpose flour for bread flour in the honey challah recipe, but the texture may be slightly less chewy and structured. Bread flour has a higher protein content, which helps develop stronger gluten and gives the challah its pillowy pull and defined shape. If you use all-purpose flour, consider kneading the dough a few extra minutes to ensure sufficient gluten development. The flavor will remain delicious, and the honey challah recipe will still yield a rich, tender loaf, but the rise and texture may be a bit softer overall.
Why does this recipe call for brushing with honey after baking?
Brushing with honey after baking enhances both the flavor and the appearance of the finished challah. This final glaze adds a beautiful shine and intensifies the sweet aroma of the bread. The honey seeps slightly into the warm crust, creating a lightly sticky, glossy finish that also helps any toppings—like sesame seeds or sliced almonds—stick more securely. This technique is especially popular for Rosh Hashanah, when sweetness symbolizes a sweet year ahead, making it a meaningful detail in this traditional honey challah recipe.
How should I store leftover challah?
To keep challah fresh, store it at room temperature in an airtight container or wrapped tightly in foil or plastic wrap. The honey in the honey challah recipe helps naturally preserve moisture, but the bread is best enjoyed within 2 to 3 days. Avoid refrigerating it, as cold temperatures can dry out the loaf. If you won’t finish it within a few days, slice and freeze individual portions. Reheat in a warm oven or toaster for best results.
Can I freeze the dough or baked loaves?
Yes, the honey challah recipe works well for freezing at both the dough and baked stages. For unbaked dough, complete the first rise, shape it, then freeze the shaped dough on a tray. Once solid, transfer to a freezer-safe bag. Thaw in the refrigerator overnight, then let it rise again before baking. For baked challah, let the loaves cool completely, then wrap tightly and freeze for up to 2 months. Reheat in a 300°F oven until warmed through.
How do I know the challah is fully baked?
The loaves are done when the tops are deeply golden and the bottoms sound hollow when tapped. This usually takes 25 to 30 minutes at 350°F with convection. An instant-read thermometer inserted into the center should register around 190°F to 195°F. If the top browns too quickly, loosely tent with foil. Fully baked challah should feel light for its size and pull apart easily once cooled.